
 6 MIN READ
 UPDATED AUG 26, 2026
📘 For new employees on Toku. Last updated August 18, 2026.
Complete your employment setup by working through the onboarding checklist, uploading identity documents, signing your employment agreement, and submitting everything for review.
Before you start
- Your invitation email with your sign-in link. Check spam if it does not arrive.
- Ready: legal name, date of birth, address, phone, Social Security Number, bank routing and account numbers, and emergency contact details.
- Identity documents (US Passport or Driver's License plus Social Security Card) as PDF, PNG, or JPEG under 10 MB.
Sign in to Toku
- Go to app.toku.com in your browser. You see Welcome back and a single Email box - there are no product tabs to choose.
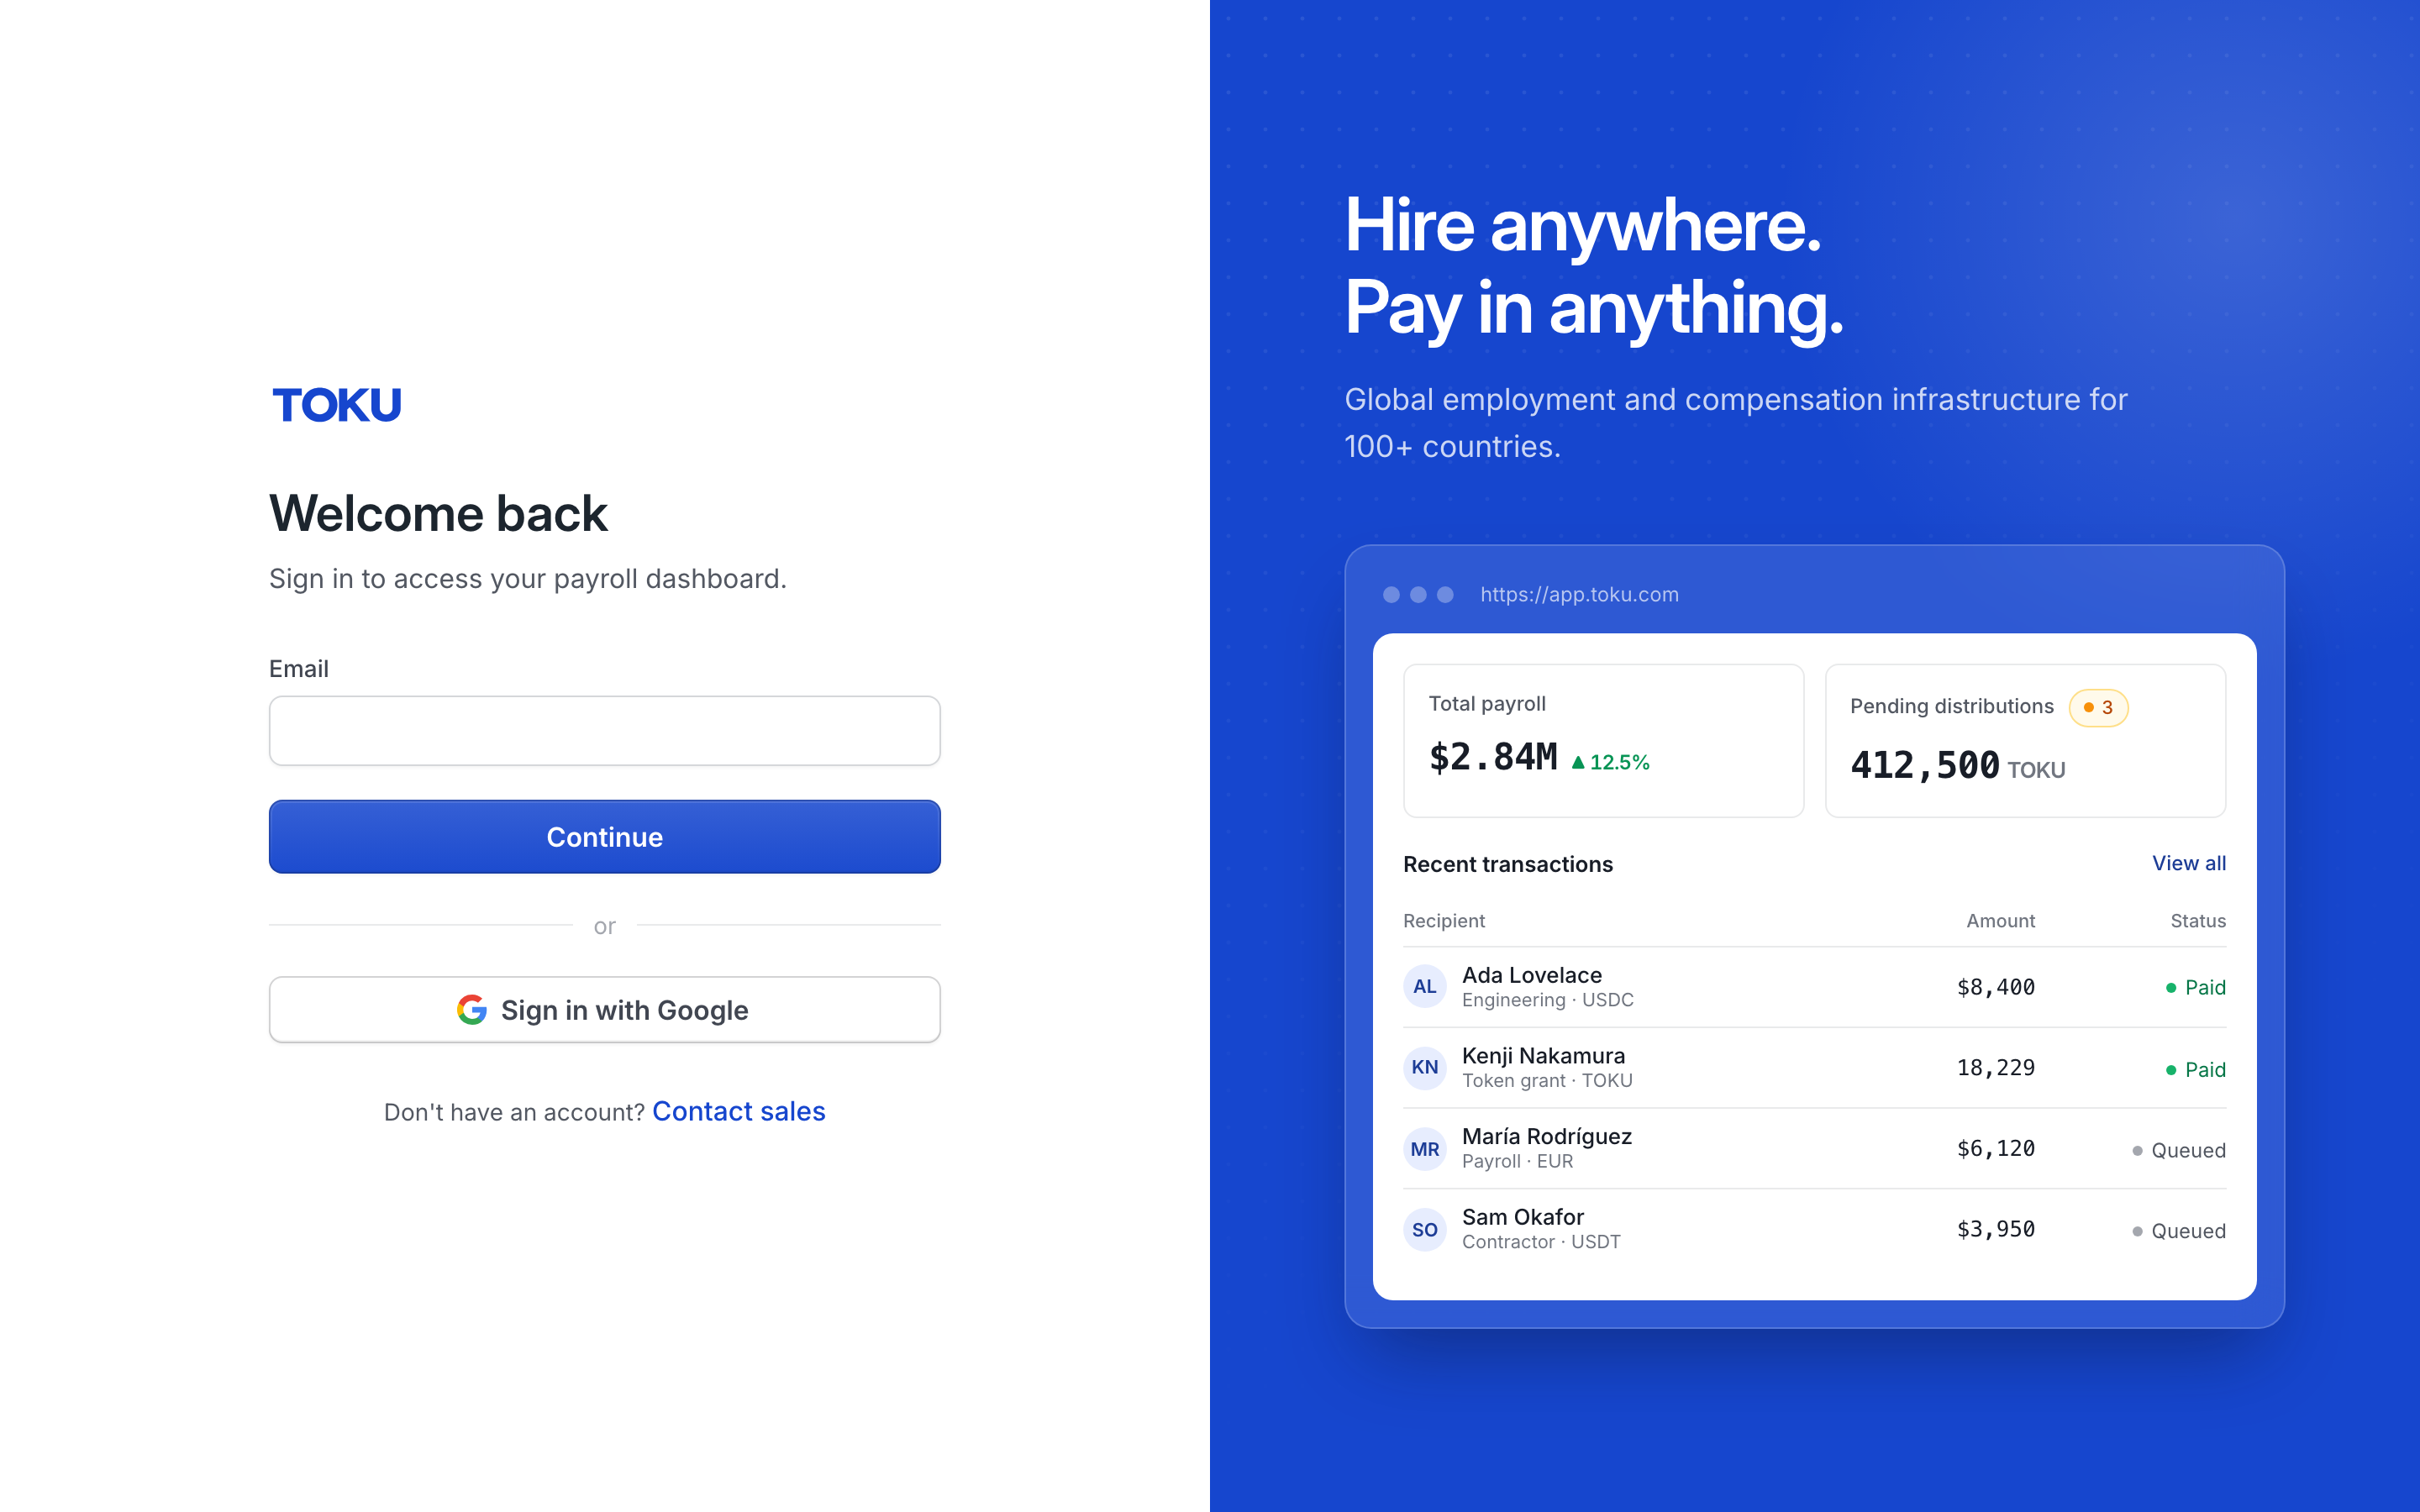
- Enter the email address your invitation was sent to and select Continue, then enter your password and select Sign in. (If your Toku email is a Google account you can select Sign in with Google instead, or ask Toku to email you a one-time sign-in link.) You will see a page titled "Welcome, [Your First Name]!" with a checklist showing "0 of 10 steps complete".
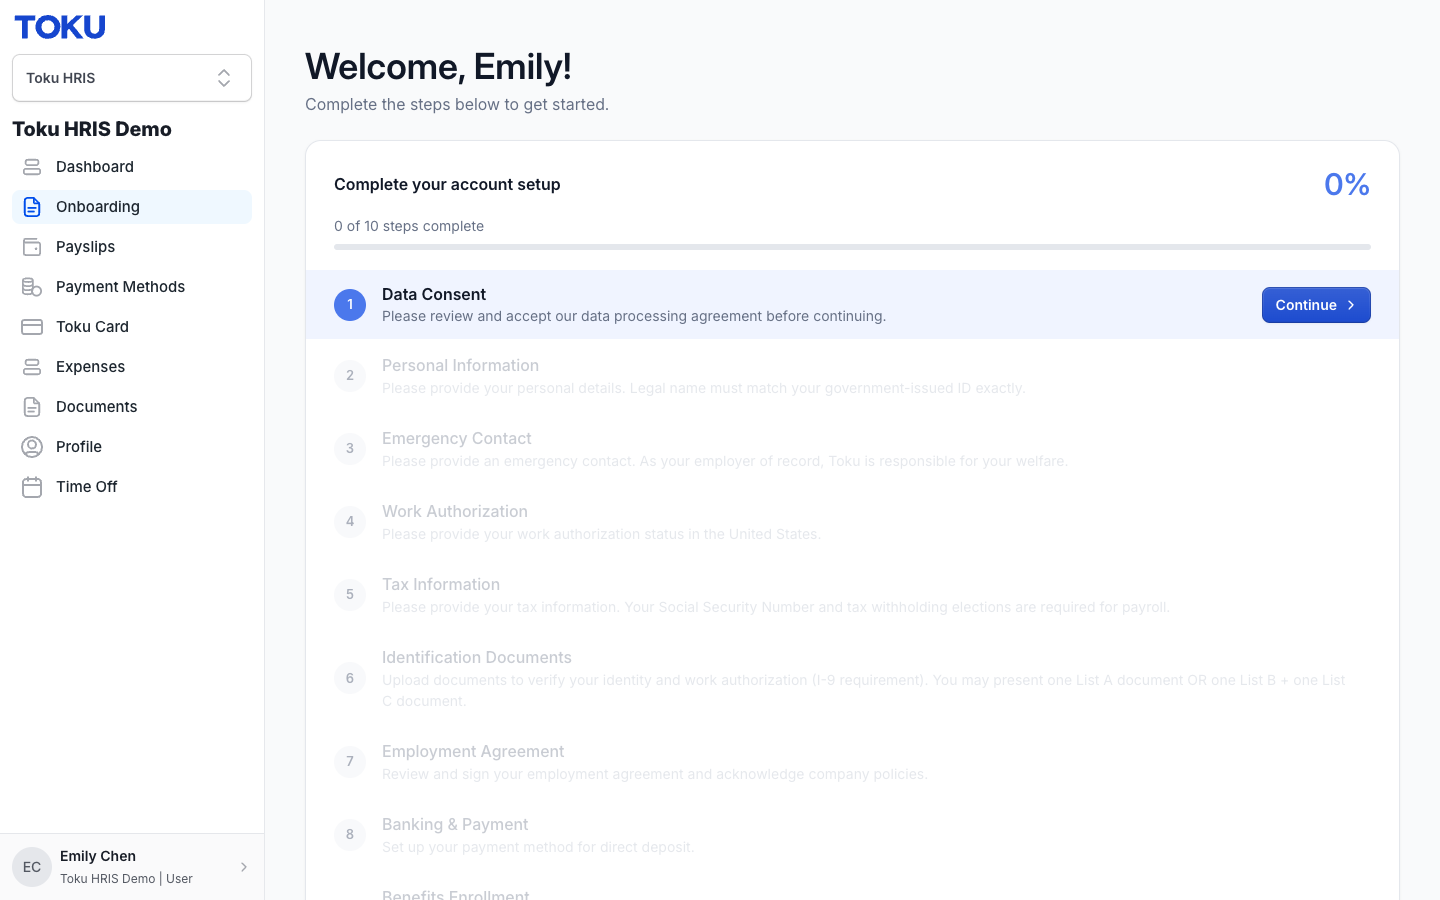
Complete your personal information
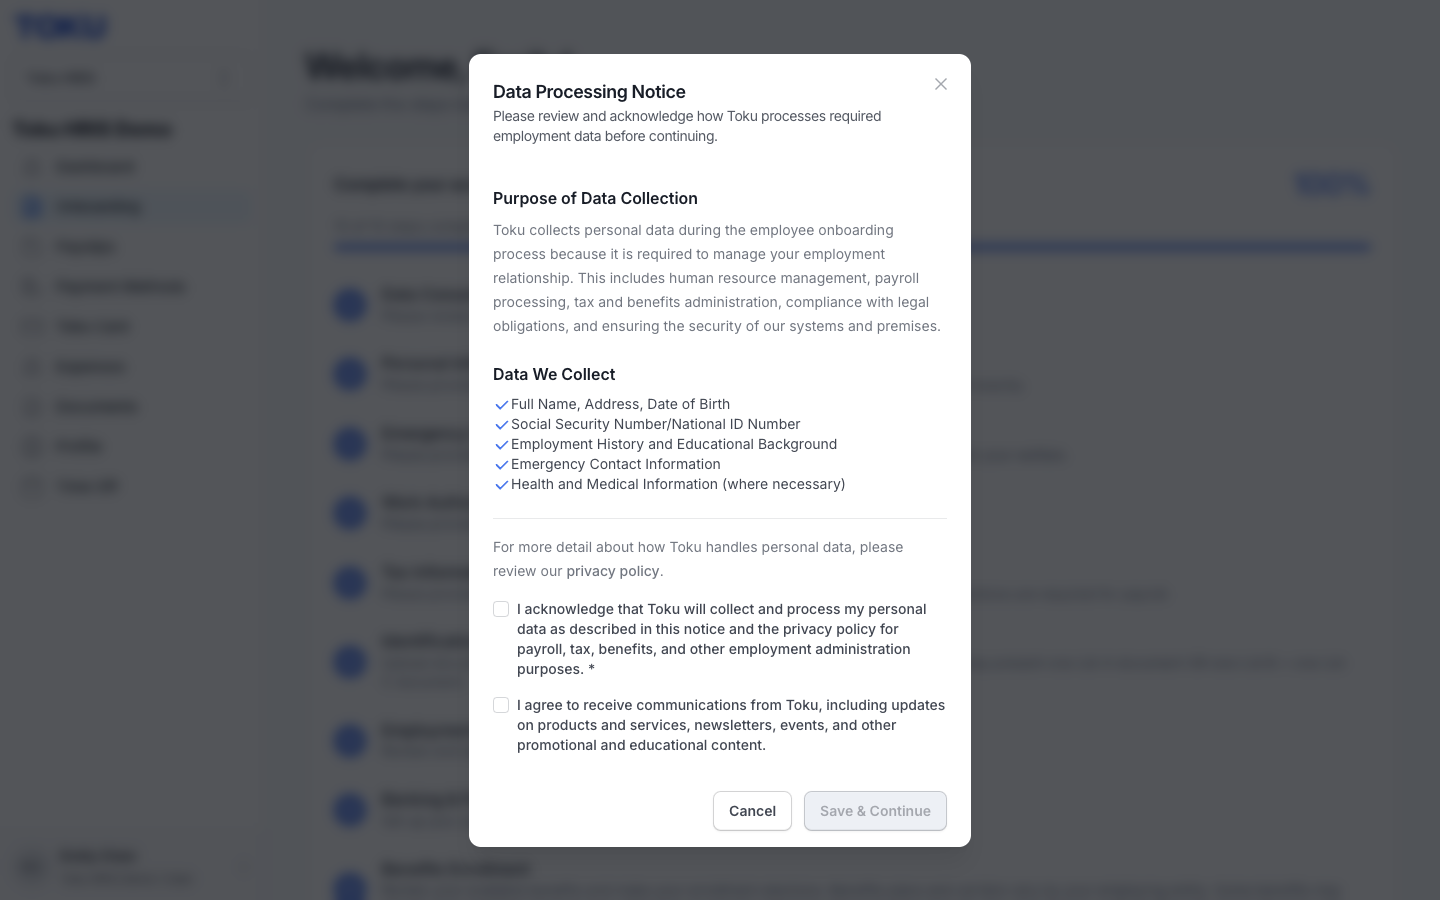
- Select Continue on the Data Consent step. Tick the required box (marked with *) to acknowledge data processing. Optional newsletters box is fine to skip. Select Save & Continue.
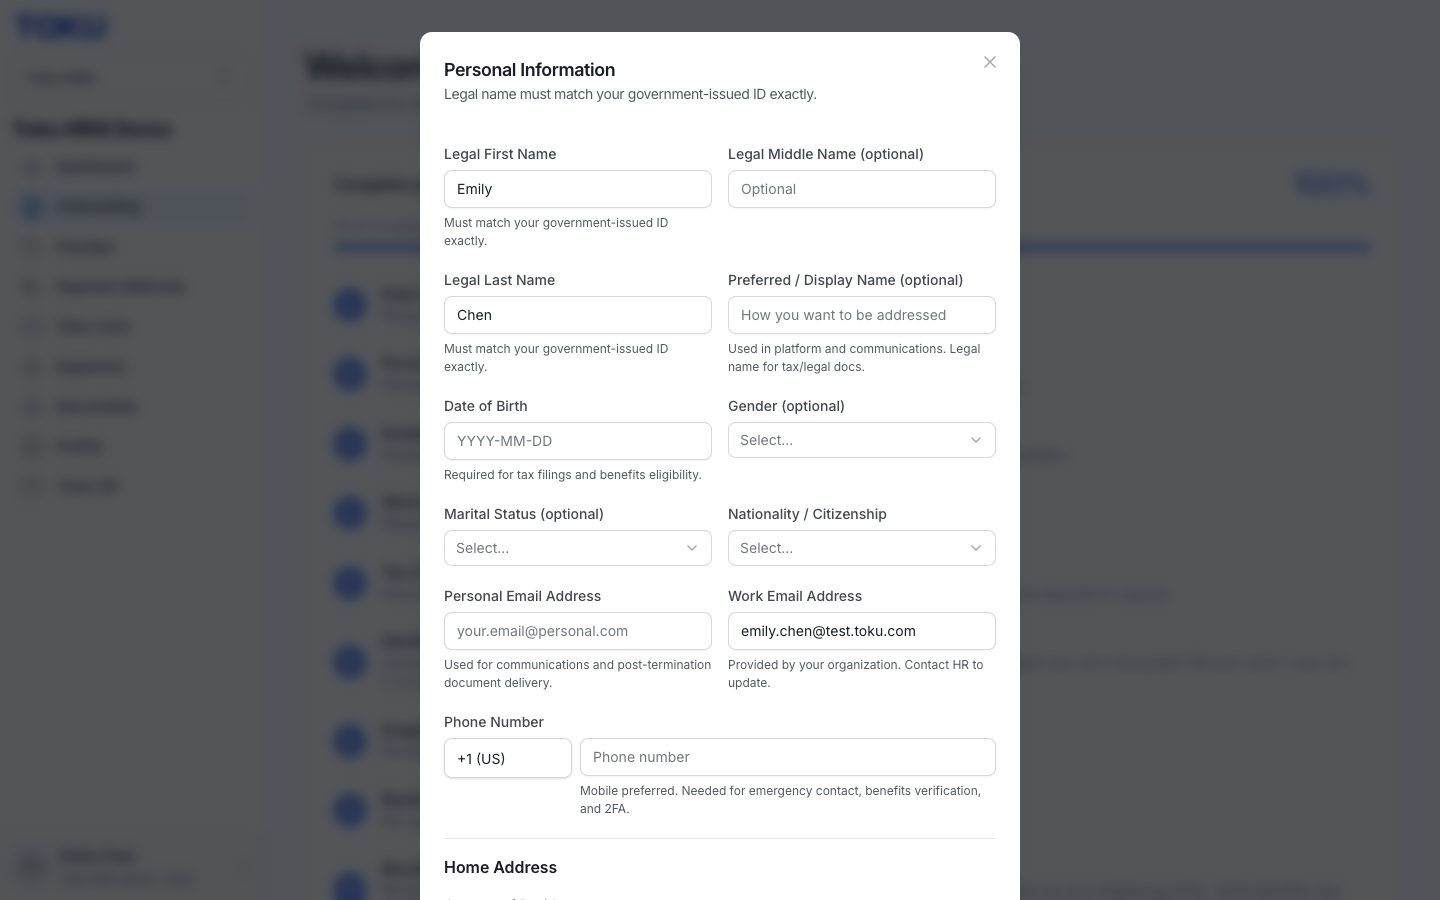
- Check your legal first and last name against your ID (your organization may pre-fill this). Fill in date of birth (YYYY-MM-DD format), nationality, email, and phone. Gender and marital status are optional. Select Save & Continue.
- Scroll down inside the same window to fill in your home address (street, city, state, ZIP). Select Save & Continue. Your checklist advances to "2 of 10 steps complete".
Provide work authorization and tax details
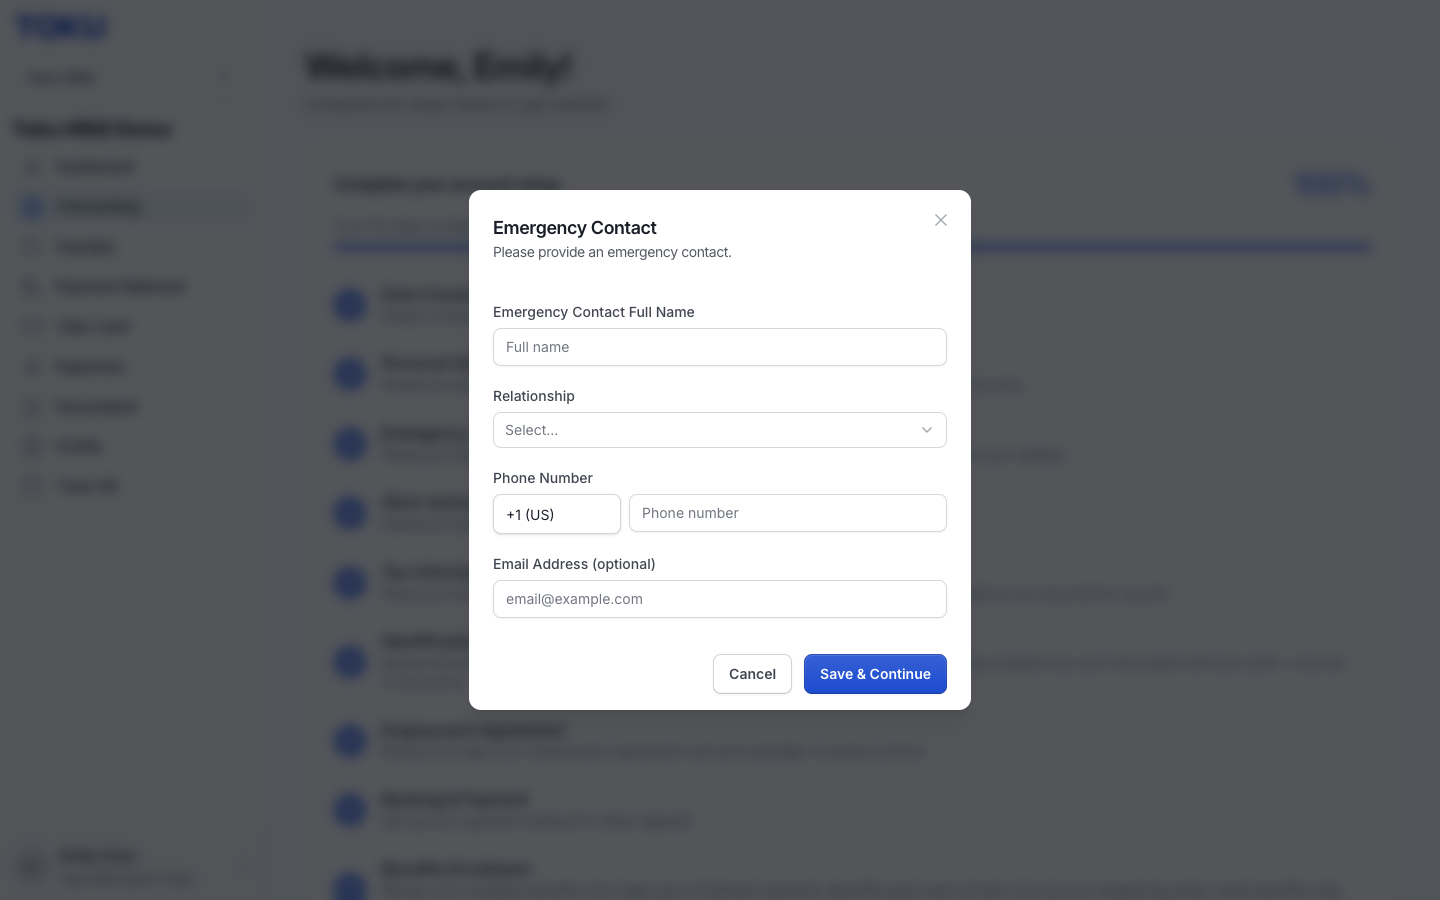
- Fill in your emergency contact: full name, relationship (Spouse, Partner, Parent, Sibling, Friend, or Other), and phone number. Email is optional. Select Save & Continue.
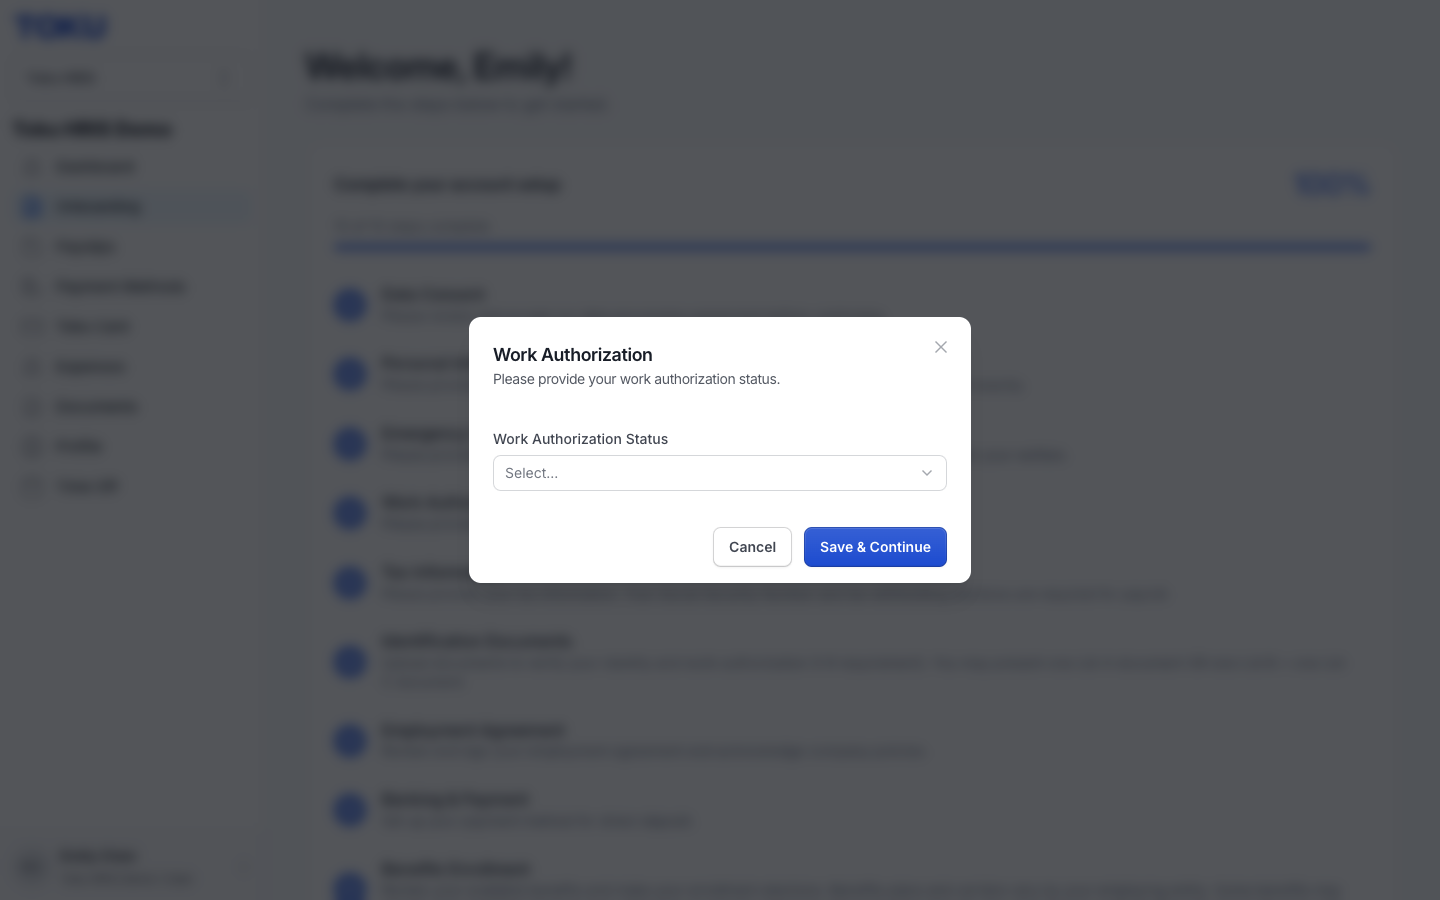
- Choose your work authorization status from the dropdown - for example US Citizen, Permanent Resident (Green Card), or visa type. Select Save & Continue.
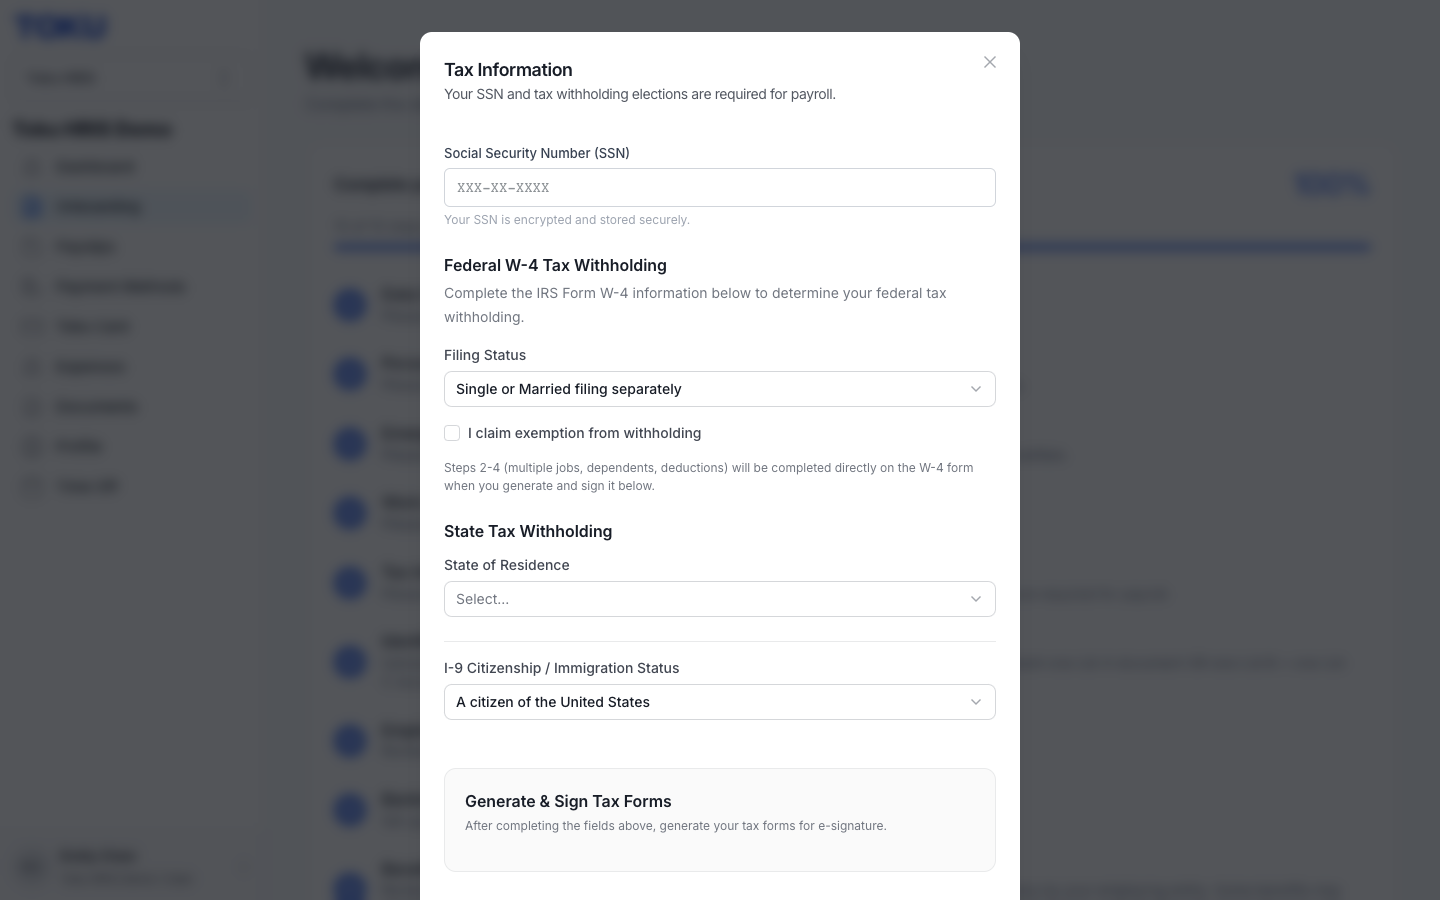
- Enter your Social Security Number in XXX-XX-XXXX format (encrypted; only the last four digits show afterward). Choose your federal filing status and state for tax withholding. The I-9 citizenship field pre-fills as "A citizen of the United States" - change it if needed. Select Save & Continue.
Upload your identity documents
- From the dropdown "Which documents are you providing?", choose List A if you have one document proving both identity and work authorization (like a US Passport), or List B + List C if you are providing two separate documents (like a Driver's License plus Social Security Card).
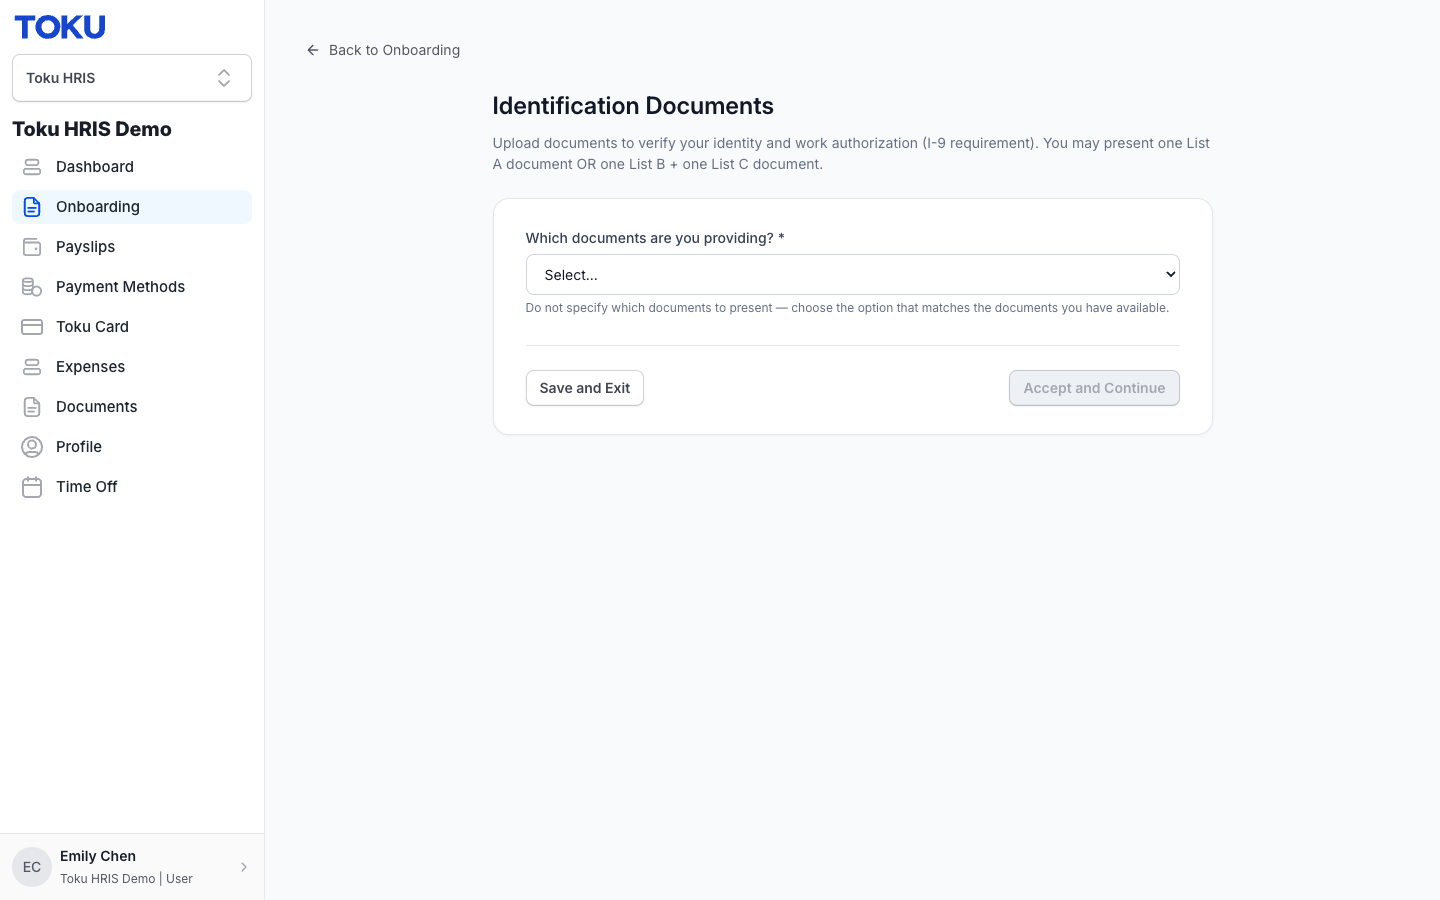
- Select (or drag) your file into the upload box. Wait for the file name to appear in green. If it does not, check that it is PDF, PNG, or JPEG and under 10 MB. Select Accept and Continue once uploads are complete.
Signing your employment agreement
- When the Employment Agreement step opens, you will see that your agreement was sent to your email via DocuSign, a secure signing service. Check your email (including spam) for a message from DocuSign and follow its steps to sign.
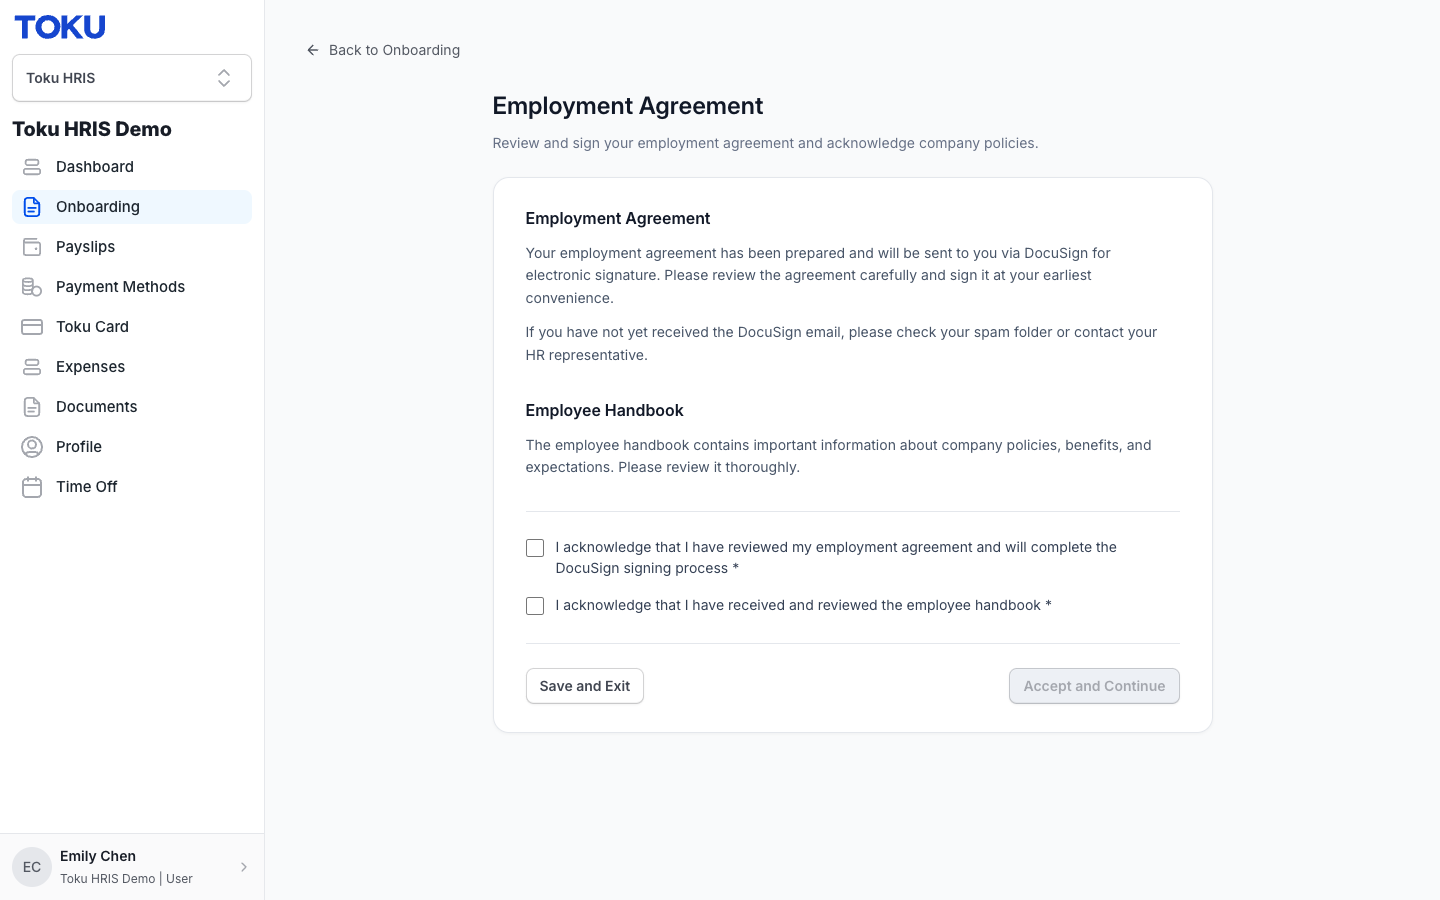
- On the Employment Agreement page, tick the first box to confirm you have reviewed your agreement. Tick the second box to confirm you have received and reviewed your employee handbook. Both boxes must be ticked before Accept and Continue activates.
- After you and your organization sign in DocuSign, the fully signed copy appears under Documents in the left-hand menu. It can take days to appear because both parties must sign first.
Provide banking and benefits
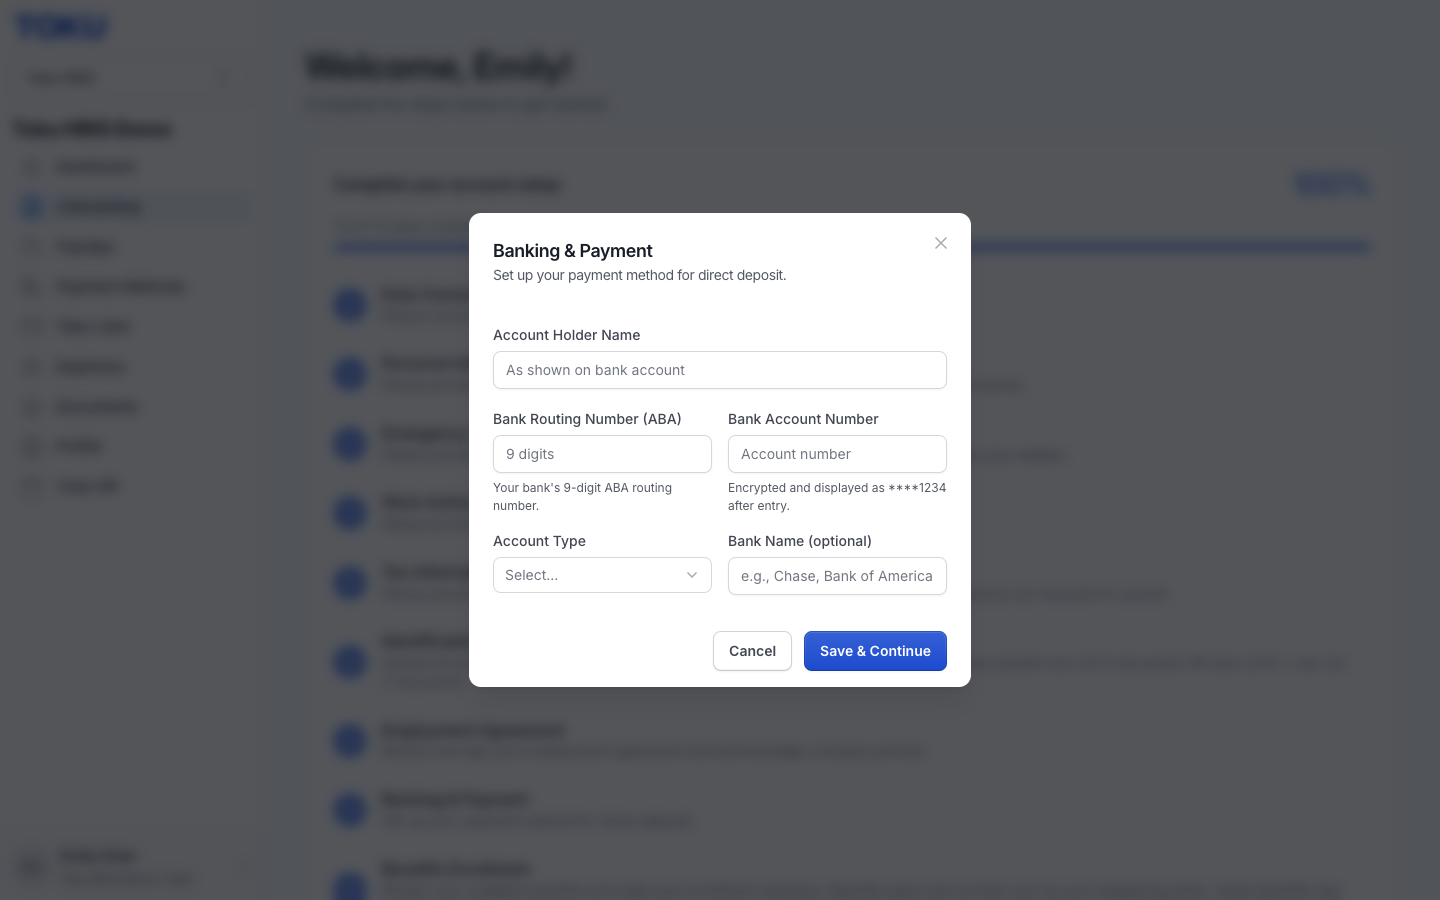
- Enter the account holder's name exactly as it appears on your bank account, your bank's 9-digit routing number, and your account number (encrypted; only the last 4 digits show afterward). Choose Checking or Savings. Bank name is optional. Select Save & Continue.
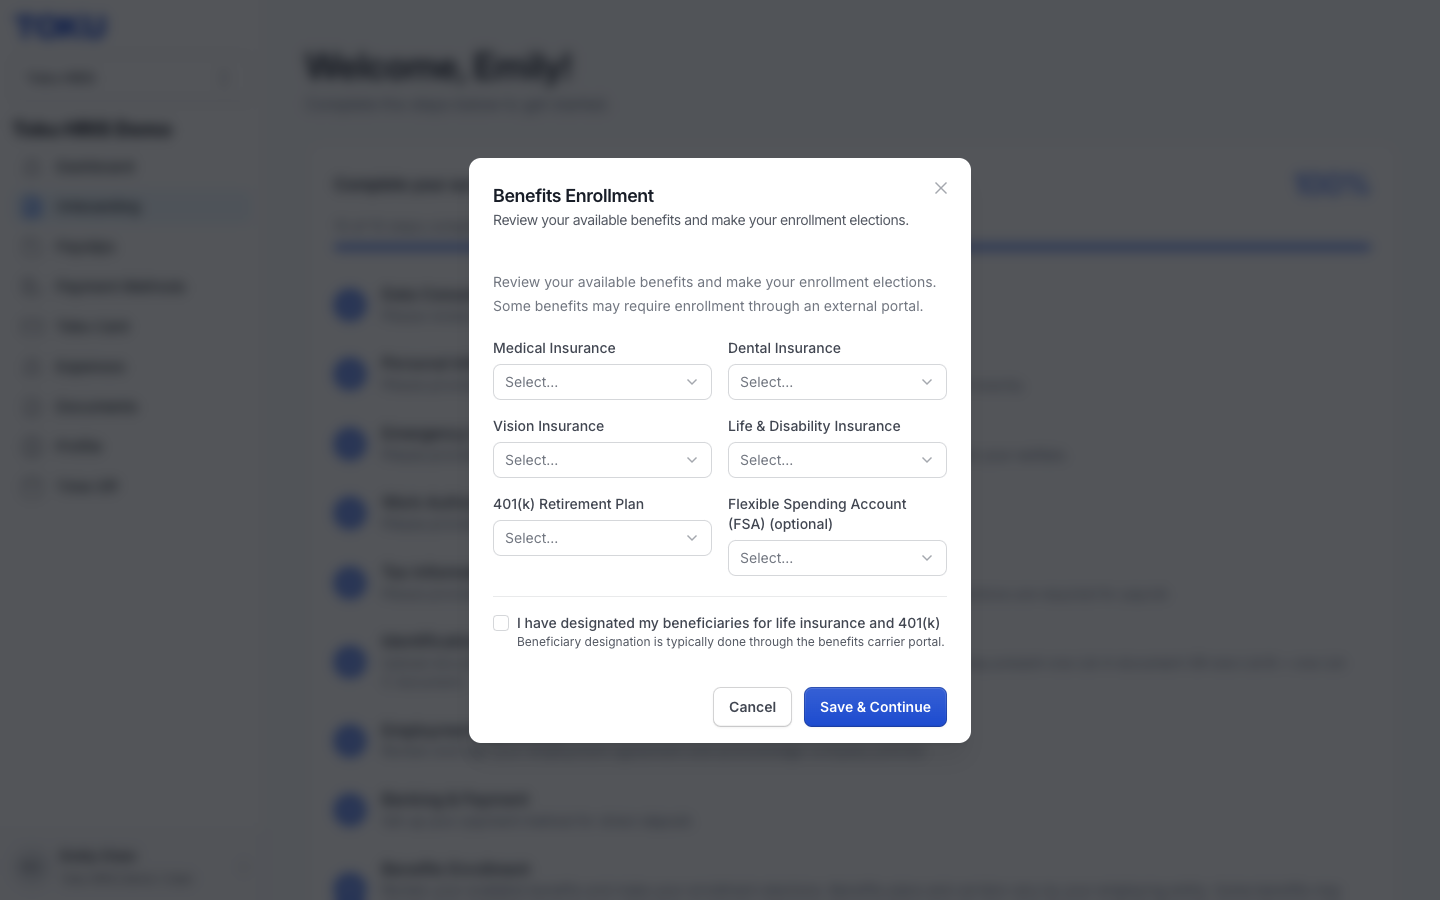
- For each benefit (Medical, Dental, Vision, Life & Disability, 401k, or FSA), choose Enroll, Waive Coverage, or I need more information. Some benefits complete later in an external carrier portal. Select Save & Continue.
Review and submit your onboarding
- Select Continue on the final step, Review & Confirm. It shows a summary of all your entries: personal information, emergency contact, work authorization, tax details (with SSN masked), and banking. Read each card.
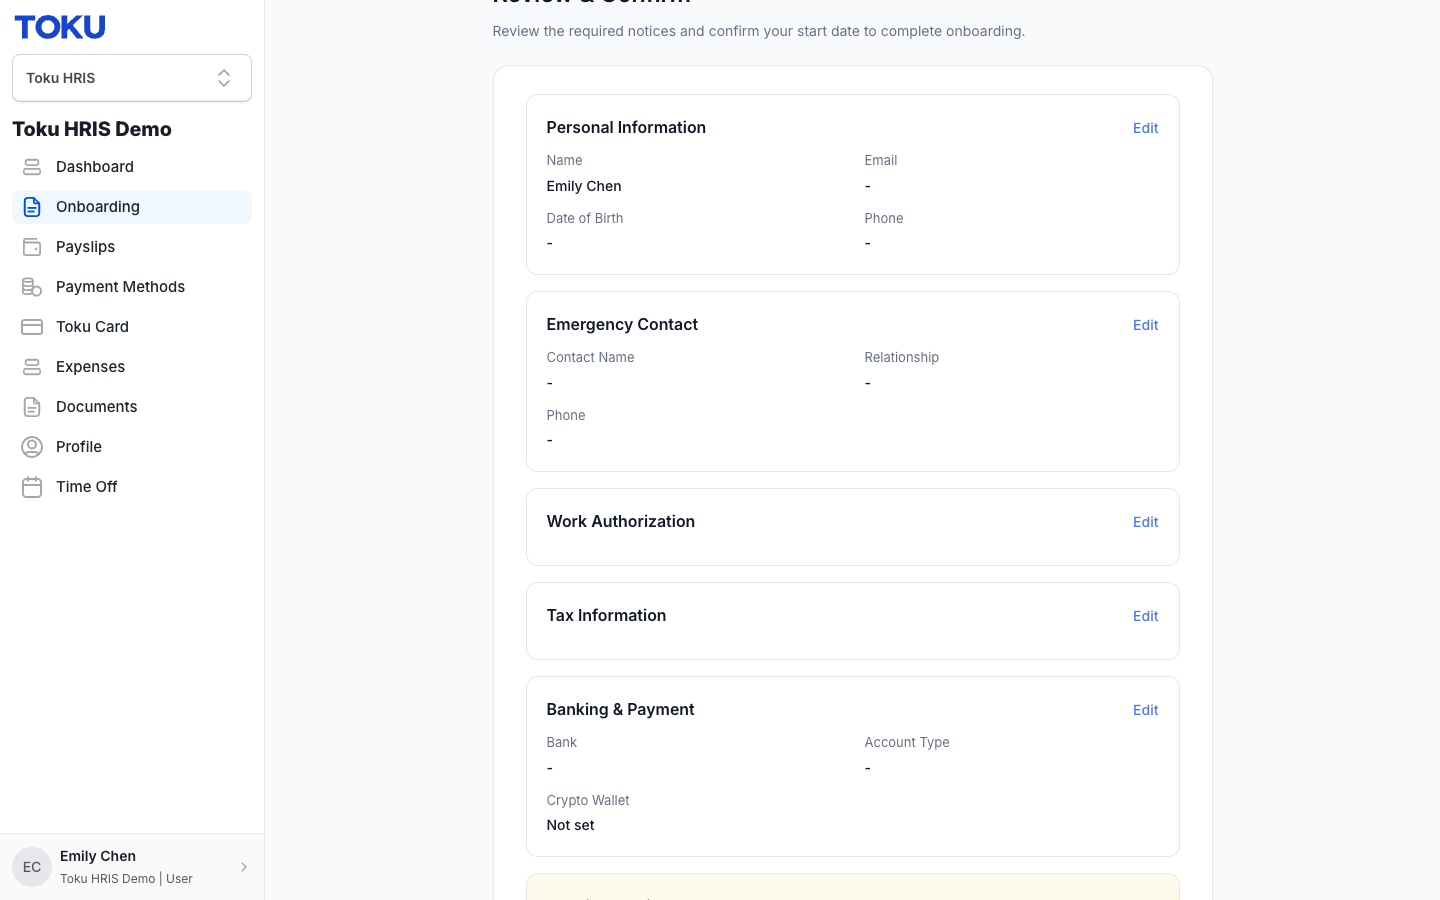
- If anything is wrong, select the blue Edit link at the top right of that card to reopen the step and fix it. Otherwise, scroll to the bottom.
- Tick all required boxes under Required Notices (labor-law and state-specific notices) and tick "I confirm the agreed start date". The Submit Onboarding button activates only after every required box is ticked. Select it to send your answers to your organization and Toku for review.
Good to know
- Saved steps show a blue check mark. You can sign out and return later without losing completed steps.
- Session timeouts lose any typing you have not yet saved, but completed steps remain. Sign in again to resume.
- Optional fields like gender or middle name do not hold you back from completing onboarding.
- After submission, your status changes to "Submitted" (under review) then "Completed" when review finishes.
- Access platform sections (Dashboard, Documents, Time Off, and more) as soon as you sign in. Payroll pages fill in once your employment is fully active.
- If a button looks disabled (greyed out), an unticked required field above is the reason - scroll up to find and complete it.
Still stuck?
You can email [email protected] to reach our support team. Please include your email address, organization name, and a description of what happened. Screenshots and videos are always welcome to speed up the troubleshooting process. Feel free to reach out any time for further assistance.