
 6 MIN READ
 UPDATED OCT 30, 2026
⚠️ Contractor invoice and payment deadlines: late action means late payment
- Contractors: submit invoices by the 19th of each month. A saved draft is not a submitted invoice.
- Admins: approve invoices by the 21st of each month. Submission alone does not authorize payment.
- Funding: Toku must receive cleared funds 4 - 5 business days before payout. Initiating a transfer or sending proof of payment does not meet the deadline.
- Standard monthly payout: the last day of the month, provided submission, approval, and funding deadlines are met. Late submission, approval, or funding will delay payment. Every day of delay pushes payment back by at least one day. A missed payment cycle can cause a longer delay; the invoice due date is not a guarantee of payment.
Automation does not remove these deadlines. Earlier published holiday deadlines take precedence; see Toku: 2026 End-of-Year Payroll & Payment Guide.
📘 For contributors and contractors on Toku. Last updated October 30, 2026.
When you're added to Toku, you'll receive a welcome email with an activation link. Follow these steps to activate your account, complete your onboarding form, sign your agreement, and gain full access to your dashboard.
Before you start
- Check your email (including spam/junk folders) for your welcome message from the Toku Team.
- Set aside 10 - 15 minutes to complete the onboarding form.
- Complete onboarding as soon as possible - many countries require contributor information at least 5 business days before your start date.
Invoice automation is chosen by your administrator
When your administrator adds you as a contractor through People → Add People, they can choose automatic invoice creation, submission, and approval after Contract and before Review. These choices belong to the administrator’s setup, so you do not need to find an invoice automation step in your own onboarding form.
Complete your onboarding and payment details as requested. Automatic creation waits until onboarding is complete and the first cycle is eligible; ask your administrator which invoice tasks you need to handle manually.
See the illustrated contractor onboarding walkthrough.
Step 1: Activate your account
- Open your welcome email from the Toku Team and click Activate My Account. If the button doesn't work, copy and paste the activation link into your browser.
Step 2: Set up your password and two-factor authentication
- Create a strong password for your Toku account. Two-factor authentication (2FA) is required because your account contains sensitive information including tax documents, agreements, and personal records.
- Keep your 2FA app or method accessible - you'll need it each time you log in.
Step 3: Complete your onboarding form
You'll work through a short form in this order:
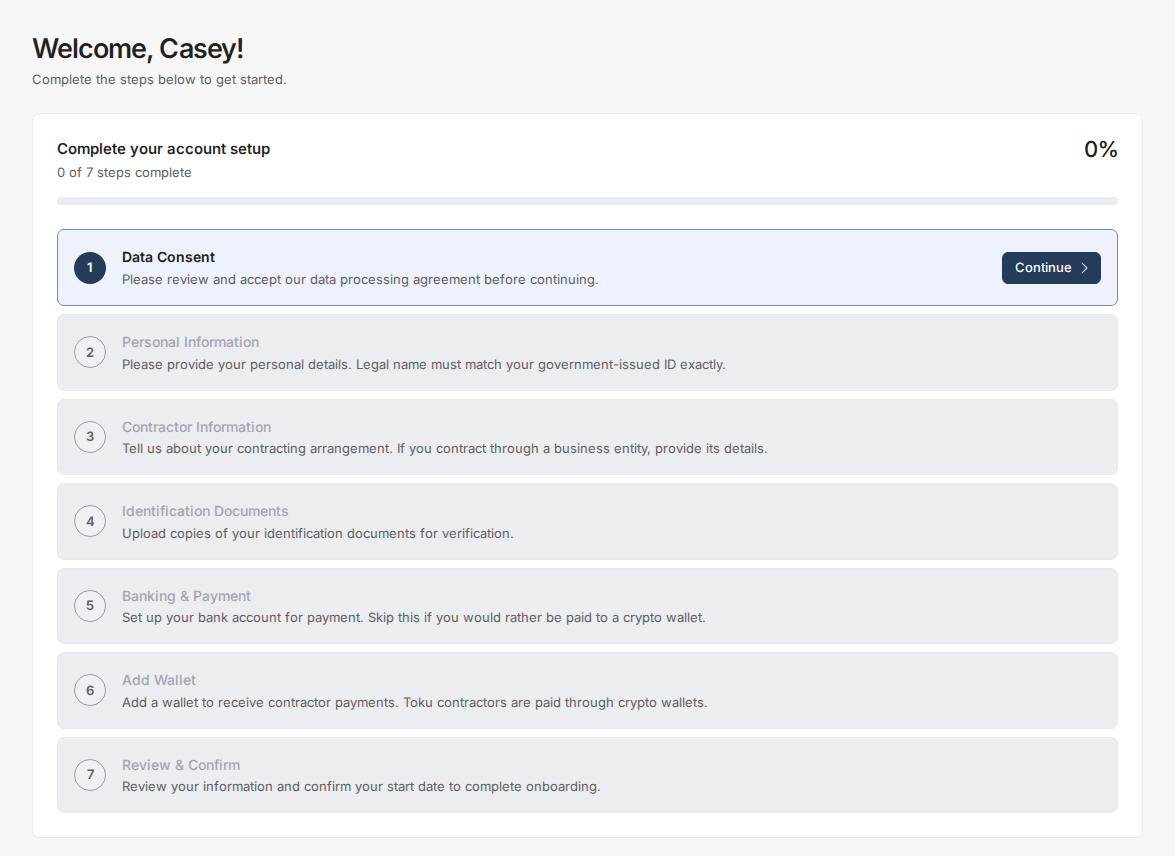
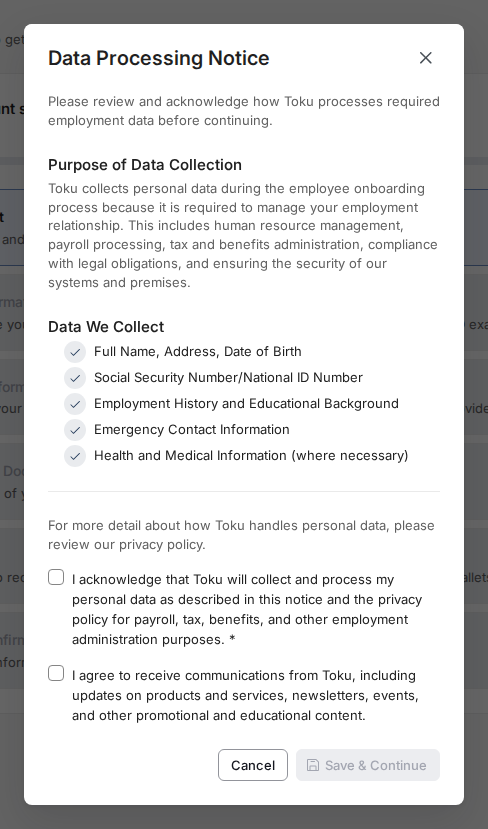
- Data Consent: Review and agree to Toku's Data Collection and Processing Consent to ensure your information is handled securely.
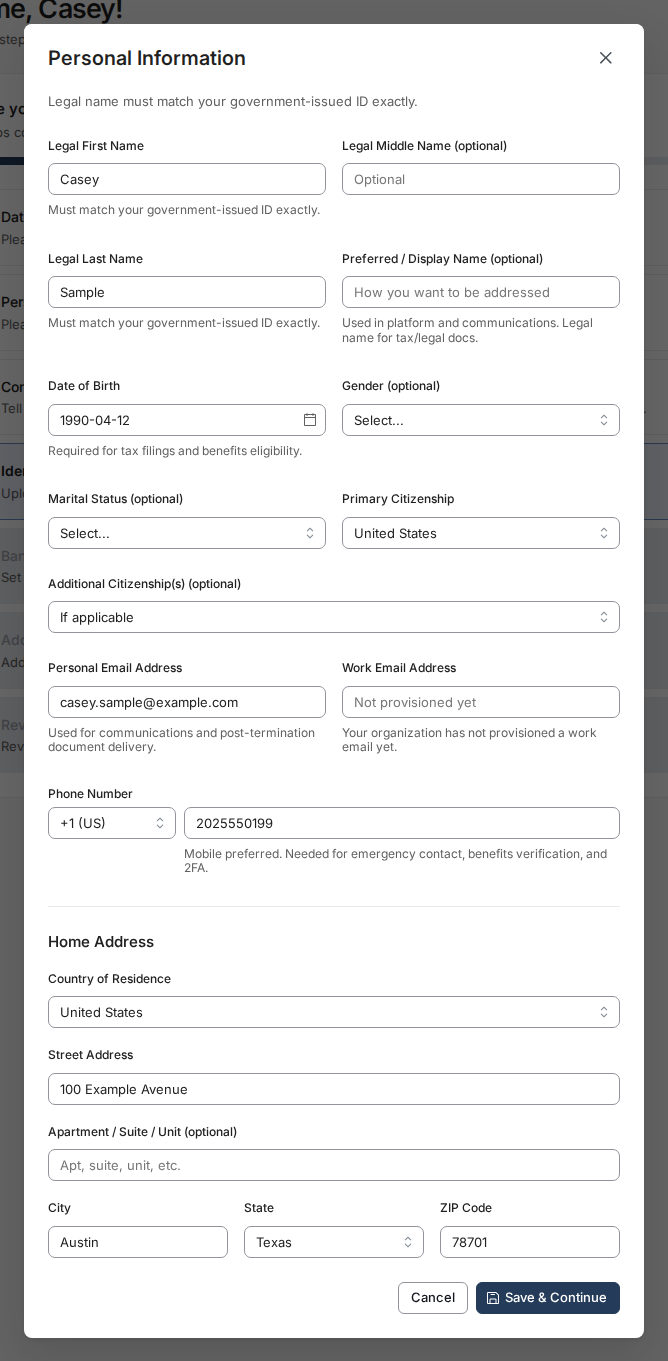
- Personal Information: Enter your legal name, date of birth, nationality/citizenship, personal and work email addresses, phone number, and home address. This information is required for your contracting agreement and local compliance.
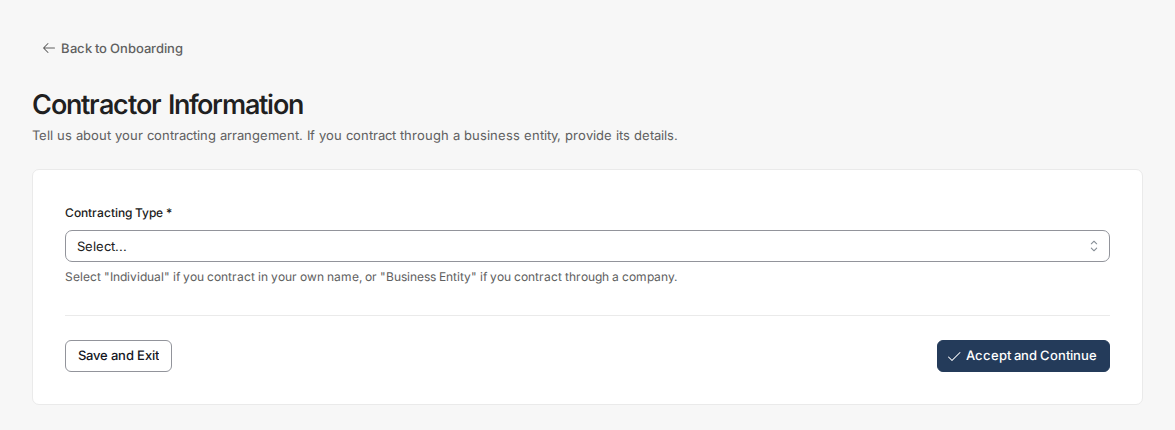
- Contractor Information: Tell us about your contracting arrangement - select whether you're contracting as an individual or through a business entity, and provide the entity's details if applicable.
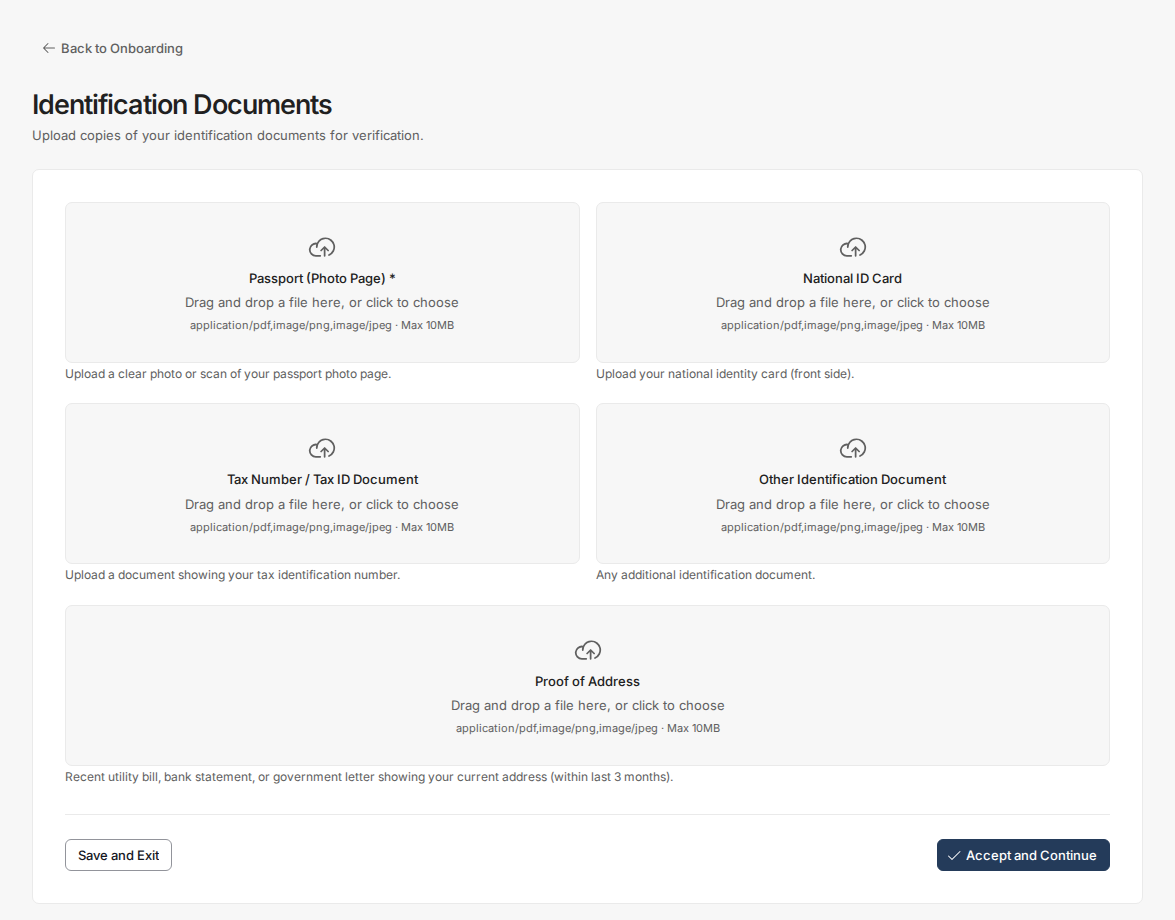
- Identification Documents: Upload a clear photo or scan of your passport photo page (required). Depending on your situation you may also add a national ID card, a tax number/tax ID document, another identification document, and proof of address (a utility bill, bank statement, or government letter dated within the last 3 months).
- Banking & Payment (if shown in your checklist): Add the bank account you want to be paid to. If you would rather be paid to a crypto wallet, select I'll be paid to a crypto wallet instead to skip this step. You need at least one way to be paid - a bank account or a wallet - to finish onboarding.
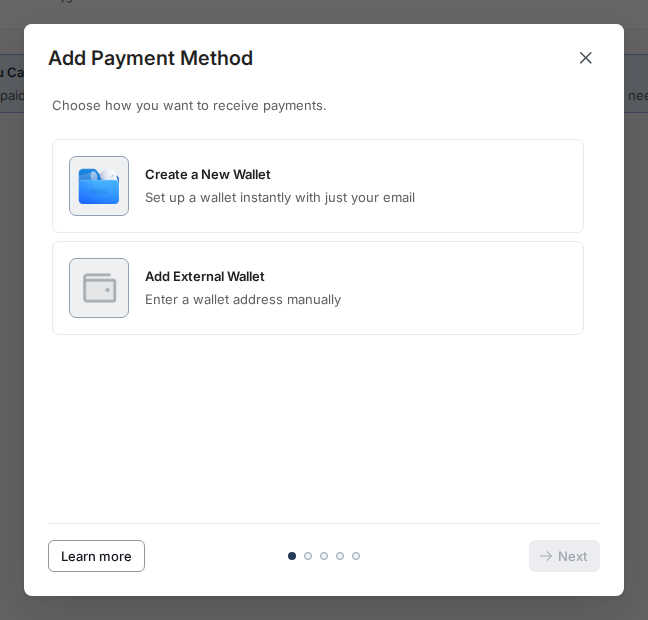
- Add Wallet: Add a wallet to receive your contractor payments. Toku contractors are paid through crypto wallets - create a new wallet with just your email, or add an external wallet address manually. You can skip this step if you added a bank account.
- Review & Confirm: Verify all your information is accurate, then confirm your start date to complete onboarding.
Step 4: Sign your employment or consulting agreement
- After Toku reviews your submitted information, your agreement will be sent to you for e-signature. Review it carefully and sign to proceed.
- You'll also receive a welcome email with links to benefits programs for your country (such as health insurance or retirement plans) and tips for using the platform.
Step 5: Access your full Toku account
In your account, you'll find:
- Once your agreement is signed, you'll receive an invite to the full Toku platform. You're now officially set up and ready to manage your employment details.
What you can do in your account
Invoices — submit invoices for your work and track their status
Documents — access your contracting agreement and other key paperwork
Payments — view your payment history
Payment Methods — manage the wallets you use to get paid
Profile — update your contact details, wallet information, and more
Using Token Payroll or Token Grant Administration?
- If you've been added to Token Payroll or Token Grant Administration, you'll receive a slightly different welcome email with a blue Activate Your Account button. The onboarding process is the same - follow the steps above.
- You can use the same email and password for both platforms, but each has its own 2FA code. On the Token platform, you'll view upcoming token payments, manage wallet addresses, set token allocation preferences, and track your payment history.
Good to know
- All identification documents are handled securely and used only for compliance verification.
- If Toku needs additional documentation (such as a national ID or tax forms), you'll be contacted directly with guidance.
- Depending on your country, the onboarding process may take a few business days for review and approval.
Still stuck?
You can email [email protected] to reach our support team. Please include your email address, organization name, and a description of what happened. Screenshots and videos are always welcome to speed up the troubleshooting process. Feel free to reach out any time for further assistance.