
 11 MIN READ
 UPDATED OCT 30, 2026
📘 For organization administrators on Toku. Last updated October 30, 2026.
Upload documents for your organization and your employees - such as policies, handbooks, and files for Toku - and manage them all from one Documents page.
Before you start
- You need administrator access to your organization on Toku.
- The Documents page shows documents across your whole organization, so you do not need to open each profile individually.
- The maximum file size per document is 10MB.
Open the Documents page
- Log in at app.toku.com.
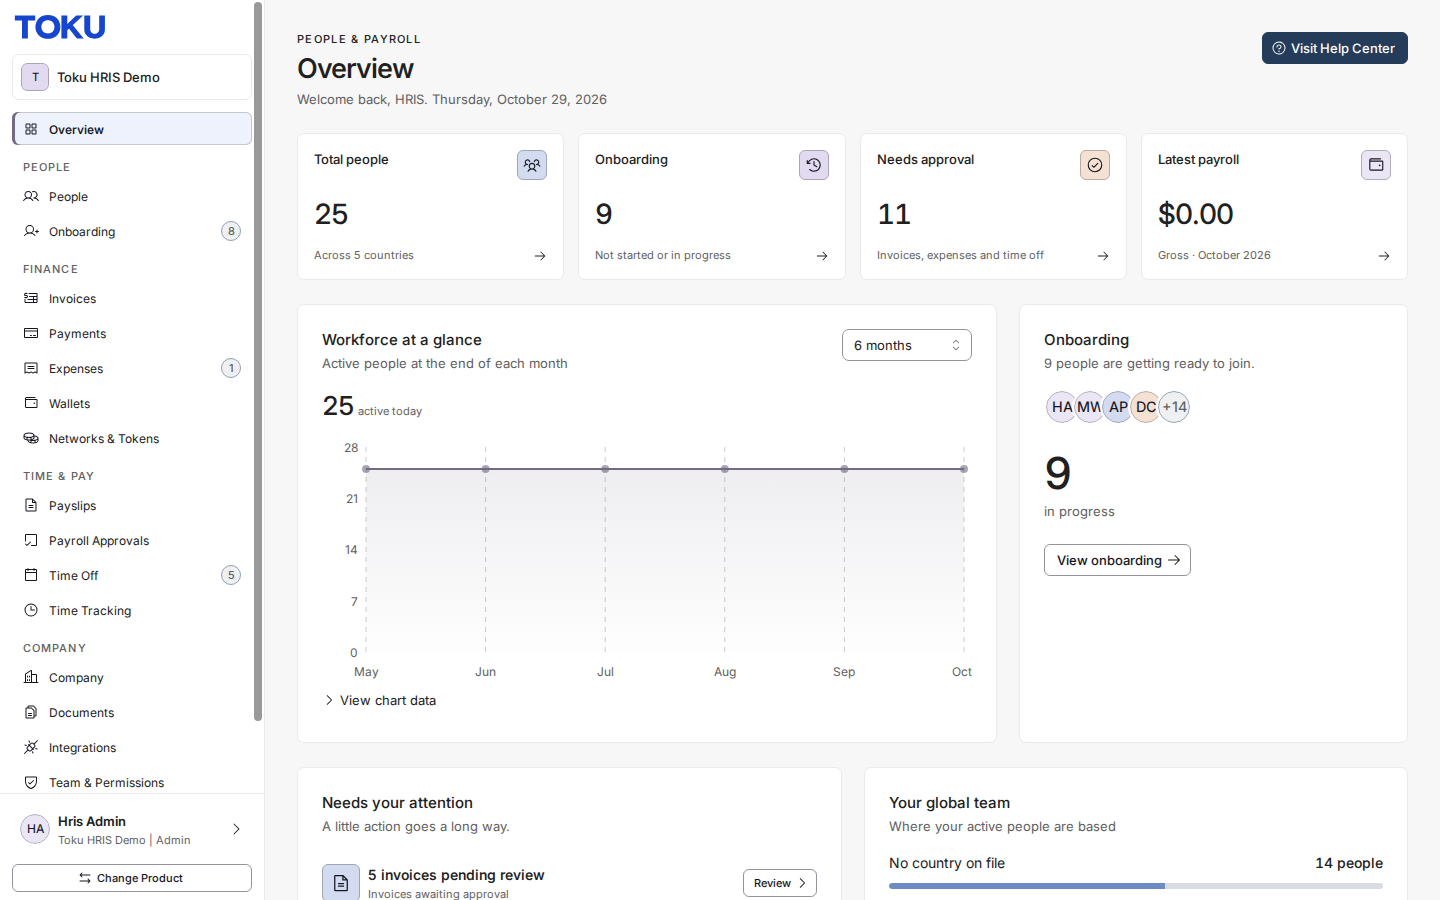
- Select Documents in the left-hand menu. Category cards at the top (All, Company Documentation and Tax Forms) and category tabs above the table (Benefits, Employment, Personal, Receipts & Other and Compliance) show counts, and the table lists each document with its employee, category, status (for example, Uploaded by admin), who it is visible to, the date it was uploaded, and its size.
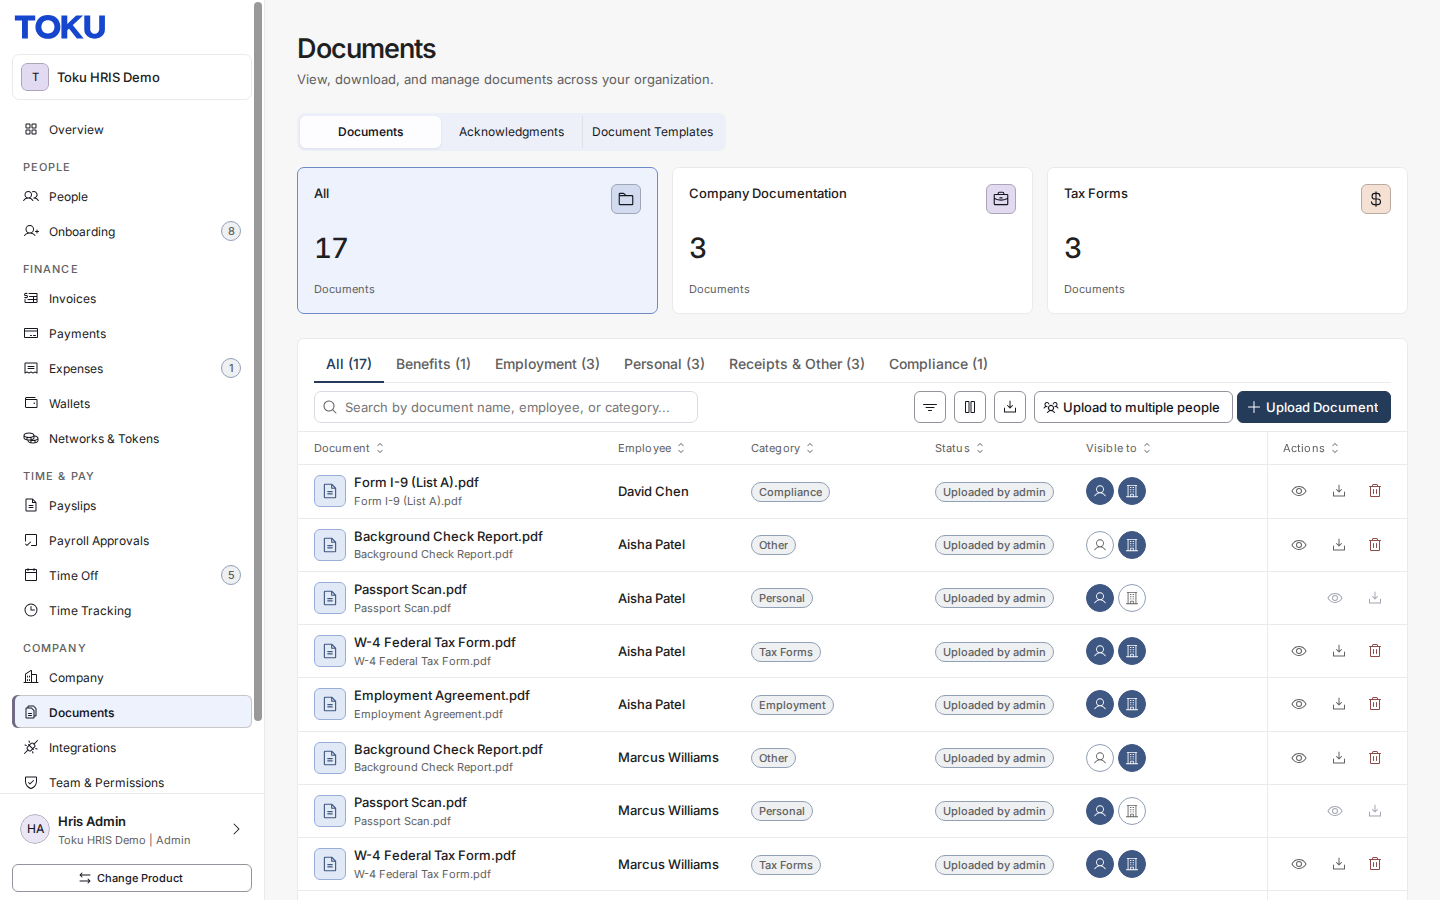
See who can view each document
The Visible to column is a read-out, not a switch. For a document filed to a person, it shows whether that employee and your organization's client admins can open it. Organization-wide documents have no employee audience, and a client-admin seat lists only the organization documents that are shared with client admins.
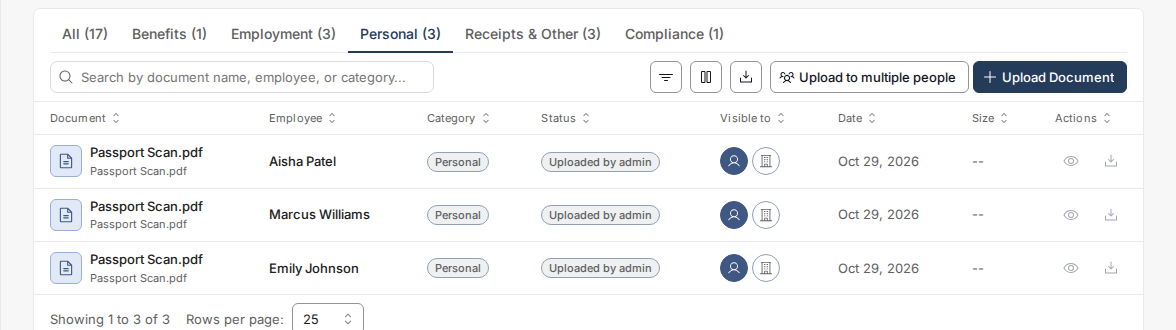
- For a document filed to a person, each row shows two small badges. The person badge is the employee the document is filed under. The building badge is your organization's client admins.
- An empty badge (white with a grey outline, instead of a filled dark circle) means that audience cannot see the document. The badges are small, so hover them to be certain rather than reading them at a glance.
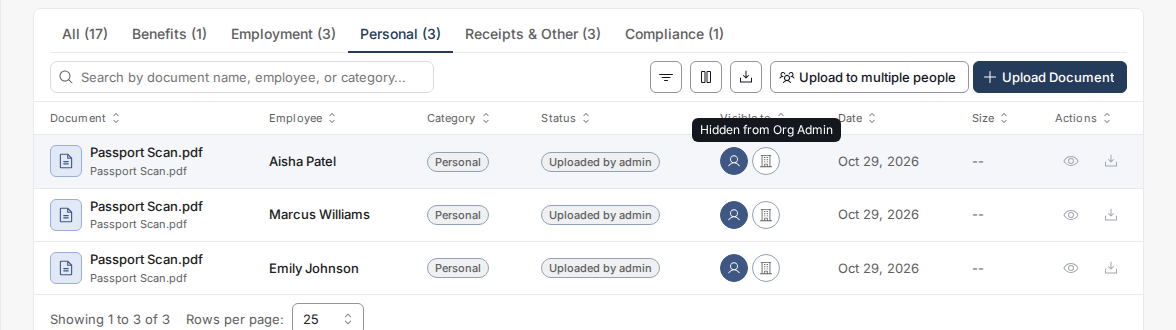
- Hover either badge to read its state in words. Each badge has its own label: the person badge reads Visible to Employee or Hidden from Employee, and the building badge reads Visible to Org Admin or Hidden from Org Admin.
- For a document filed to a person, an empty building badge means the row stays visible but its view and download actions are greyed out. Organization-wide documents behave differently: if one is not shared with client admins, its entire row is absent from a client-admin seat.
💡 For documents filed to a person, the building badge is determined by category. Personal Document, ID Document, Visa Document and Tax Document stay listed, but client admins cannot open them. W-4 Federal Tax Form and State Tax Form remain readable by client admins. Organization-wide documents use a separate per-document sharing setting instead: a client admin sees the row only when that organization document is marked visible to client admins.
⚠️ Give the file a neutral name before you upload it. A restricted document still appears in the table with its file name, category and upload date. Your organization's administrators cannot open or download it, but they can read the name - so keep confidential details out of the file name itself.
- Both badges empty means neither the employee nor your administrators can see the file. Only Toku's own team can open it.
- The person badge follows the Visible to Employee checkbox described under Good to know below. It is chosen at upload and the column itself is read-only.
- The category is fixed once a document is uploaded. To move a document to a different category - and so change whether administrators can open it - delete it and upload it again under the category you want.
- Organization-wide types - Company Documentation, Professional Services Agreement (PSA), Initial Order Form (SOF), and Benefits Enrollment Form - file under Organization instead of a person in the Employee column. From a client-admin seat, a shared PSA or SOF appears under the Company Documentation filter with active view and download actions. If the expected document is missing completely, rather than listed with disabled actions, it is not currently shared with client admins. There is no self-serve visibility switch for an existing organization document, so email [email protected] with the organization and document name and ask Toku to share it with client admins.
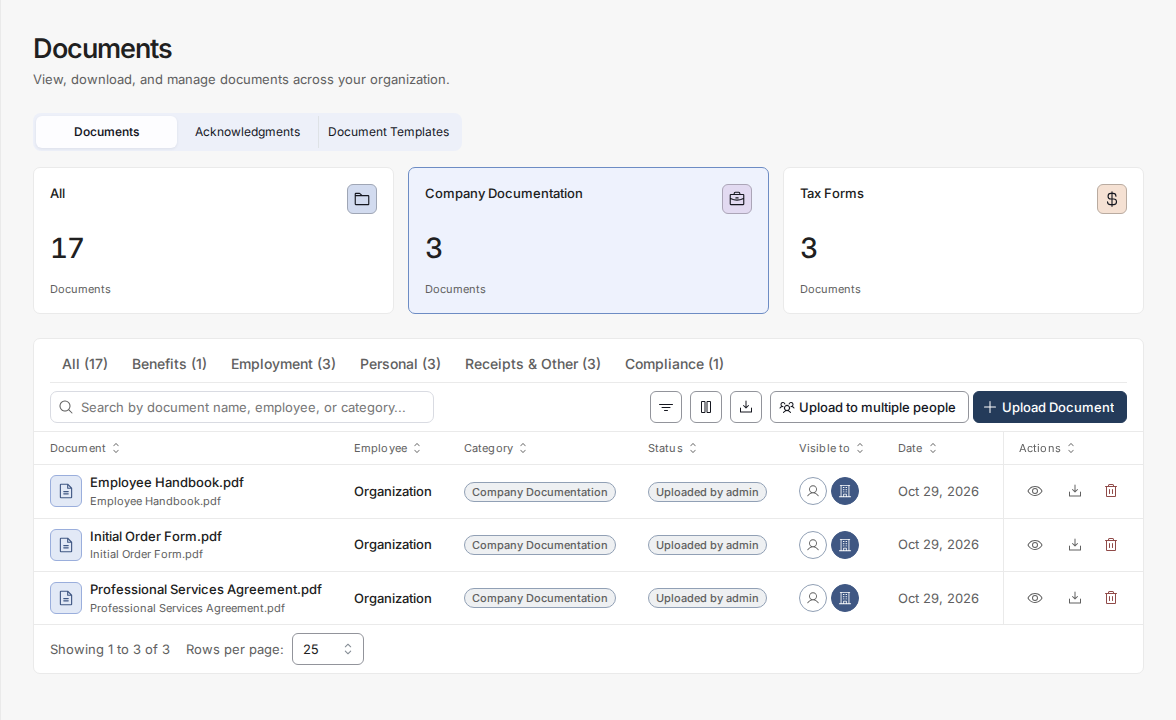
The Date column shows when a document was uploaded
The Date column is the day the document was originally uploaded - including for documents that moved across from the older Toku platform, which show the date they were first uploaded there rather than the day they were transferred.
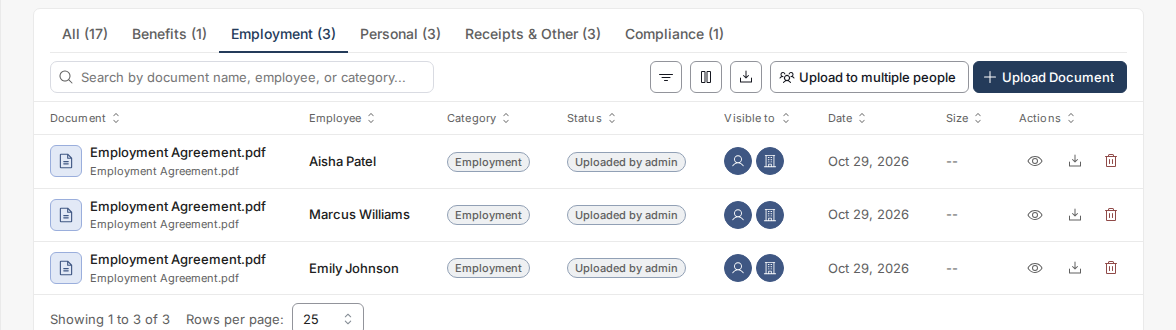
- If you remember filing something years ago and the list appears to say it arrived recently, check again - that was the old behaviour, where transferred documents all showed the transfer date. They now show the real one.
- Click the Date header to sort by it, oldest or newest first.
Upload documents
- Select Upload Document at the right of the toolbar, above the table.
- Drag and drop your file, or click to browse. To upload several at once, add each one in the same window before submitting - there's no need to reopen it per file.
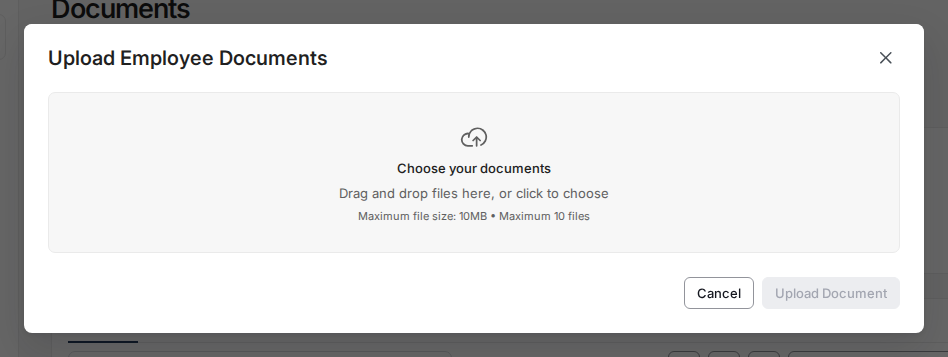
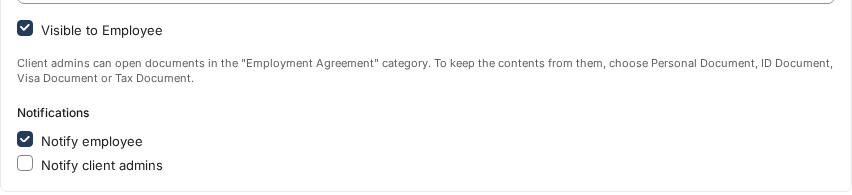
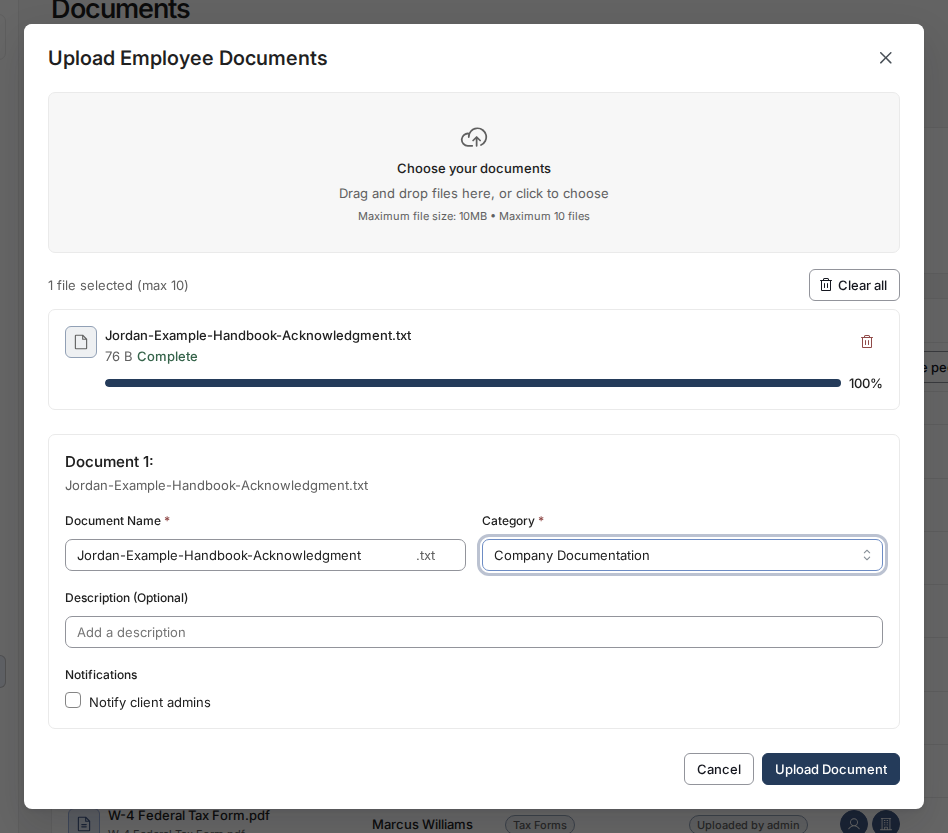
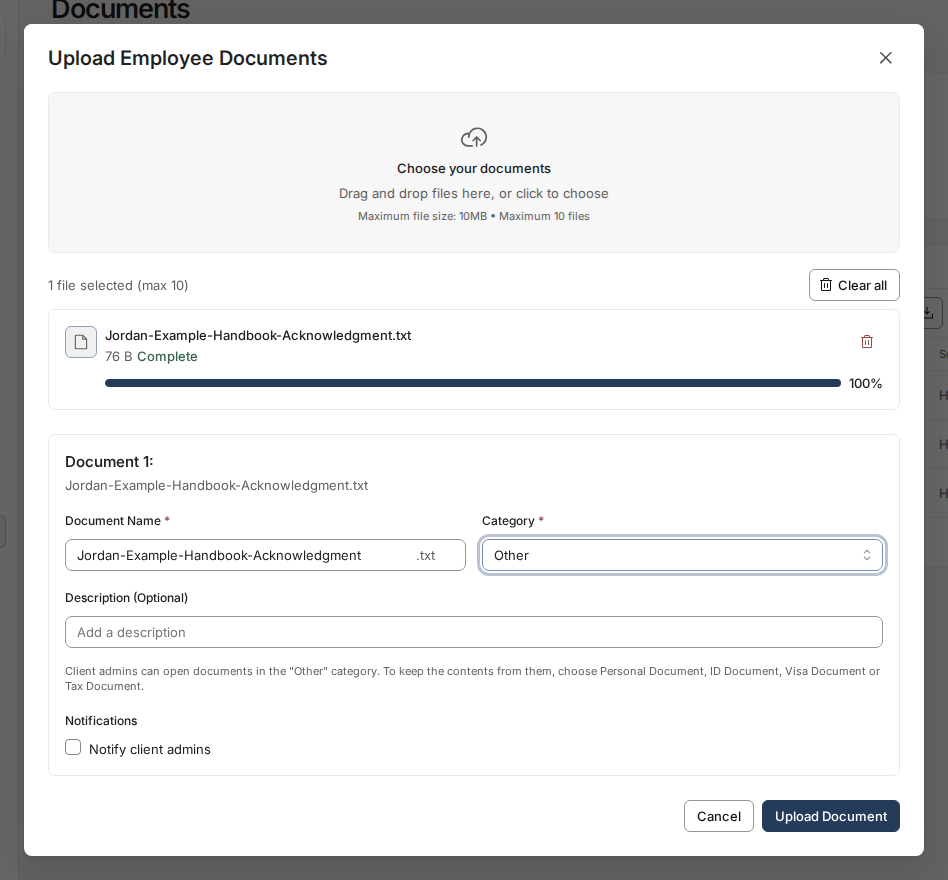
- Once a file finishes uploading, fill in its details: edit the Document Name if needed (the file extension is locked), pick a Category — specific types like Employment Agreement, W-4 Federal Tax Form, I-9 documents, or Handbook Acknowledgment, or an organization-wide type like Company Documentation, Professional Services Agreement, Initial Order Form, or Benefits Enrollment Form - and add an optional Description. For any category that isn't organization-wide, you must also pick which Employee the document belongs to; organization-wide categories skip this and target the whole company automatically. As you change the Category, a line under the visibility options tells you whether your organization's administrators will be able to open the file. On that line, and on the notification toggle below, the form says client admins — that is what it calls your own organization's administrators.
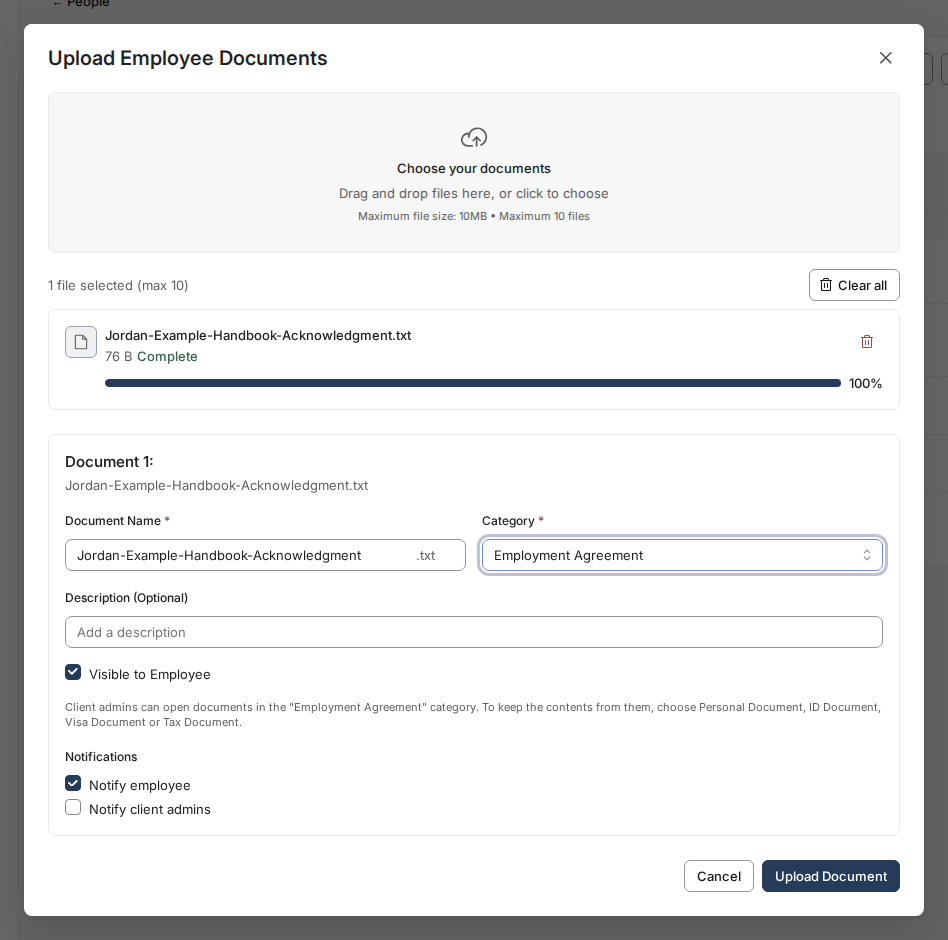
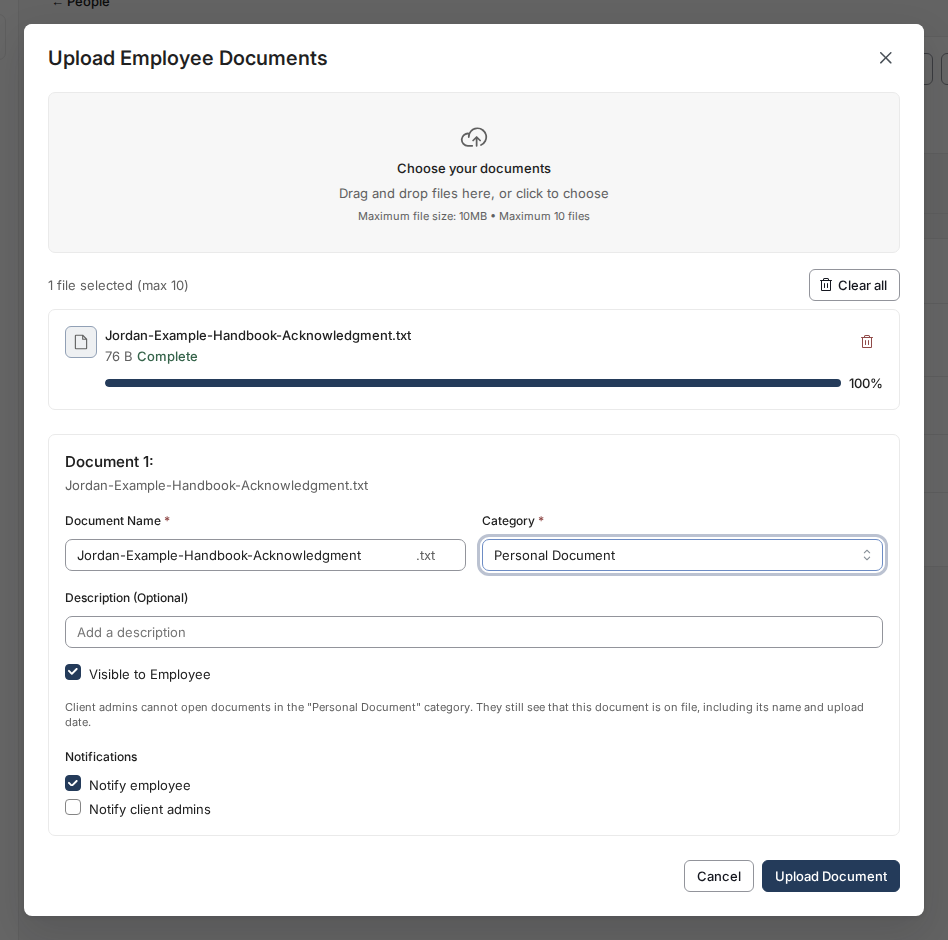
💡 That category-based client-admin line appears only for documents tied to one employee. It disappears for Company Documentation, PSA, SOF and Benefits Enrollment Form because organization-document visibility is stored separately rather than inferred from category. A new organization document uploaded by a client admin from this page is shared with client admins, but an older or migrated organization document can still be unshared. If it is missing from the client-admin list, use the support step above.
- For a document filed to a person, choose who gets told about the upload under Notifications. Notify employee (ticked by default) sends the employee an alert that a new document is on their profile. Notify client admins (unticked by default) alerts your organization's other administrators. Untick both to file that employee document silently. Organization-wide uploads are different: tick Notify client admins (unticked by default) to alert your organization's other administrators about the upload. It only reaches admins the document is shared with - if the upload is not shared with client admins, nobody is notified even with the toggle on.
- Select Upload Document to finish (the button reads Upload Documents if you added more than one file).
Delete a document from a profile
If something was uploaded by mistake - the wrong file, or the wrong person's profile - you can remove it yourself from the person's profile. Open People, select the person, and open the Documents tab under their name.
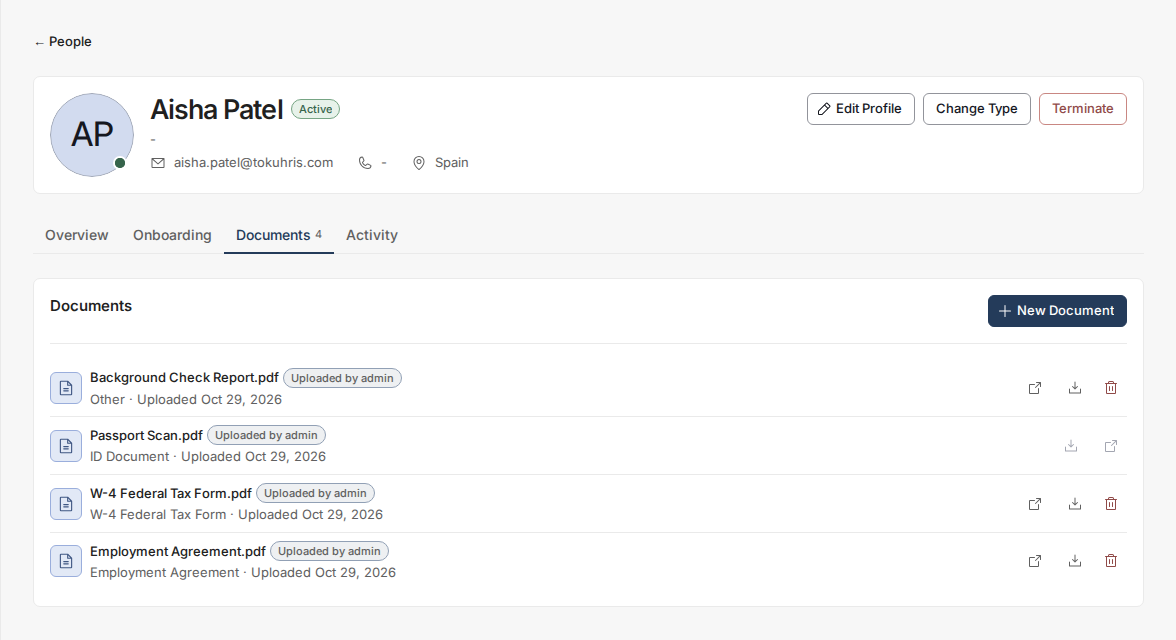
- Find the document and click the trash icon at the end of its row.
- Your browser asks you to confirm: "Delete “…”? It is removed from this profile and can no longer be opened or downloaded." Click OK to remove it, or Cancel to keep it.
- The document disappears from the profile and a "Document deleted" message appears.
🗑️ You can only delete what you can open. Identity and immigration files and other restricted categories show no trash icon - the same rule that greys out their view and download actions. Deleting is also admin-only: employees can upload their own documents but cannot remove them; if an employee needs something taken down, they should ask you or Toku support.

- Deleting removes the document from the profile - the person can no longer see or download it. It does not shred the underlying file at Toku, so if something was removed in error, contact [email protected].
Good to know
- Use the search bar and Filters to quickly find specific documents across the organization.
- To file a company-level document for your organization's administrators, choose the Company Documentation category. It is filed under Organization, so you do not choose an employee. This does not publish the file to employees or add it to their Documents pages.
⚠️ The Visible to Employee checkbox (checked by default) controls whether the employee a document is filed under can see it themselves on their own Documents page - uncheck it to keep a file HR/admin-only. It doesn't apply to organization-wide categories like Company Documentation, which have no single employee audience.
- For a document filed to a person, the notification toggles only decide who hears about the upload - they do not change who can see it. Uploading a document to your own profile never notifies you, whatever the toggle says. For an organization-wide upload, the Notify client admins toggle alerts your organization's client admins, but only reaches admins the document is shared with - nothing is sent if the upload is not shared with client admins.
- Employees can upload documents from their own Documents page too. Their upload form offers only a Notify client admins option (unticked by default); unless they tick it, no alert is sent to you or anyone else - new employee uploads simply appear on this page, so use it (or its Filters) to spot them. The category the employee picks follows the same visibility rules as above: filed under Personal Document, ID Document, Visa Document or Tax Document, the file stays listed but client admins cannot open it.
- When an upload sends an alert - a person-filed document's toggles, or Notify client admins on an organization-wide upload - it can also be delivered by email, not just in the app. Each recipient's email notification setting still decides whether they receive the email.
Still stuck?
You can email [email protected] to reach our support team. Please include your email address, organization name, and a description of what happened. Screenshots and videos are always welcome to speed up the troubleshooting process. Feel free to reach out any time for further assistance.