
 5 MIN READ
 UPDATED NOV 2, 2026
💡 Your team keeps submitting and approving expenses in Expensify, exactly as today. Toku brings in the approved reports, pays them with your normal Toku payments, and then marks each report Reimbursed in Expensify, so both systems always agree.
Setting it up takes one set of Expensify API credentials and a few minutes in Toku. This guide walks through it from start to finish.
How it works
flowchart LR
    A["Employee submits\na report in Expensify"] --> B["Manager approves\nit in Expensify"]
    B --> C["Toku imports the\napproved report"]
    C --> D["Toku pays the\nreimbursement"]
    D --> E["Toku marks the report\nReimbursed in Expensify"]
- Submit and approve in Expensify. Nothing changes for your team. Receipts, policy checks and approvals all stay in Expensify.
- Toku imports approved reports. An employee's report arrives in Toku already approved, so nobody approves it twice. A contractor's report arrives as an approved reimbursement invoice.
- Toku pays. The reimbursement is paid with your usual Toku payments, at the exchange rate shown on the approved Expensify report.
- Toku tells Expensify. Once the payment is recorded, Toku moves the report from Approved to Reimbursed in Expensify.
Before you start
Check these first. Most setup problems come from one of them.
- [ ] Toku admin access. You can sign in to Toku as an organization admin, and Employment (Toku HR) is turned on for your organization.
- [ ] An Expensify workspace admin. The Expensify account you connect must be an Admin of every workspace whose reports should come into Toku. Toku only sees reports in the workspaces that account administers. We recommend a shared finance account rather than one person's login.
- [ ] Matching emails. Each person's Expensify email should be the same as their work email in Toku. If someone uses a different email in Expensify, tell your Toku contact and we'll match it for you.
- [ ] Employees and contractors set up correctly in Toku. Employee reports become expense reports. Contractor reports become reimbursement invoices.
- [ ] Currencies. The currency of each Expensify workspace is turned on for your organization in Toku.
- [ ] Pay from one place. If you reimburse people through Expensify today, stop doing so for anyone Toku will pay, so nobody is paid twice.
Step 1: Create API credentials in Expensify
- Sign in to Expensify with the workspace admin account.
- Open expensify.com/tools/integrations.
- Create new credentials. Expensify shows two values: a partnerUserID and a partnerUserSecret.
- Copy both values now and keep them somewhere safe. Expensify shows the secret only once. If you lose it, create a new pair and use that one instead.
🔒 Please type the secret straight into Toku in Step 3. Don't send it to anyone by email or chat.
Expensify's own instructions for these credentials are here.
Step 2: Open Expensify in Toku
- Sign in to Toku as an organization admin.
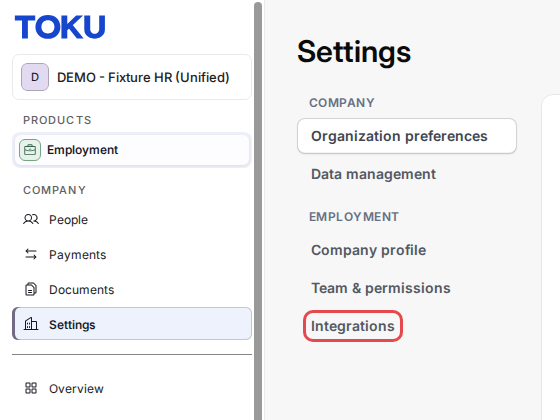
- In the left menu select Settings, then Integrations (under Employment).
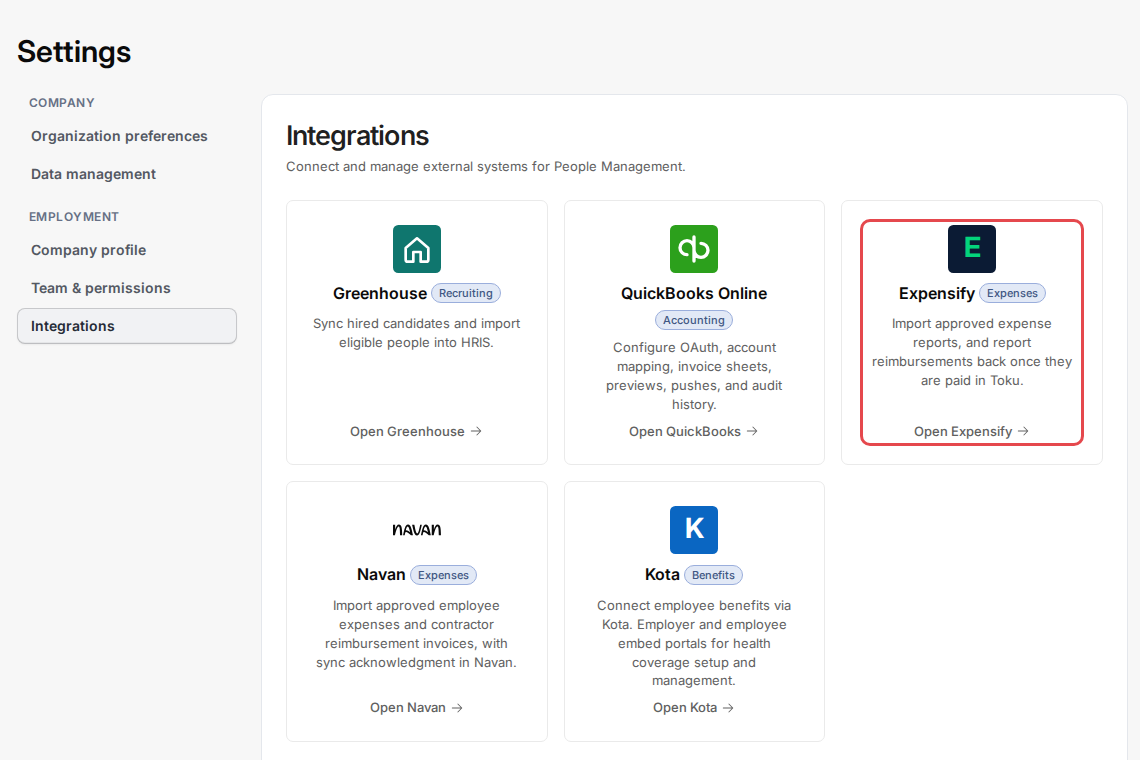
- On the Expensify card, select Open Expensify.
Step 3: Connect
- Paste the partnerUserID into Partner user ID.
- Paste the partnerUserSecret into Partner user secret.
- Select Connect. Toku checks the credentials with Expensify before it saves anything.
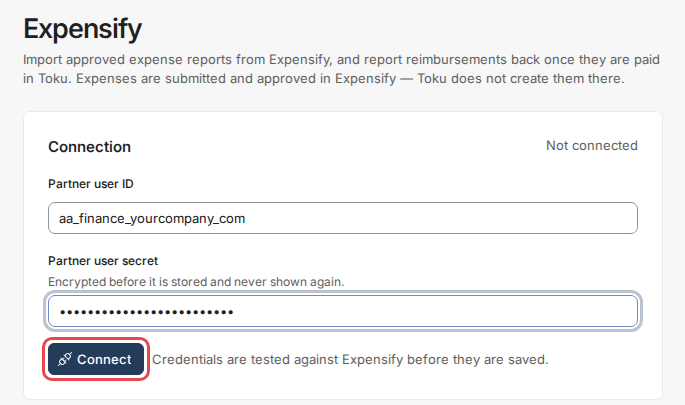
When it works: you'll see "Expensify connected" with the name of the workspace (or the number of workspaces) Toku can see, and the page shows Connected as with your partner user ID.
If it doesn't: nothing is saved, and the message explains why. Check that you copied both values in full and that the account is an admin of the workspace, then try again.
Your secret is encrypted before it's stored and is never shown again. To change it later, come back to this page, enter a new pair and select Replace credentials.
Step 4: Tell your Toku contact
Let your Toku contact know you're connected. Toku then runs the first import:
- It brings in reports that are Approved in Expensify, approved within the last 180 days. Tell us if some of those were already paid outside Toku, so they aren't paid again.
- You get a short summary of what came in and anything that needs a decision, for example an email that doesn't match anyone in Toku, a currency that isn't turned on, or a contractor invoice that may already cover the same money.
- After that, we agree how often to import, for example before each pay run. Running an import again never creates duplicates.
Step 5: Review and pay in Toku
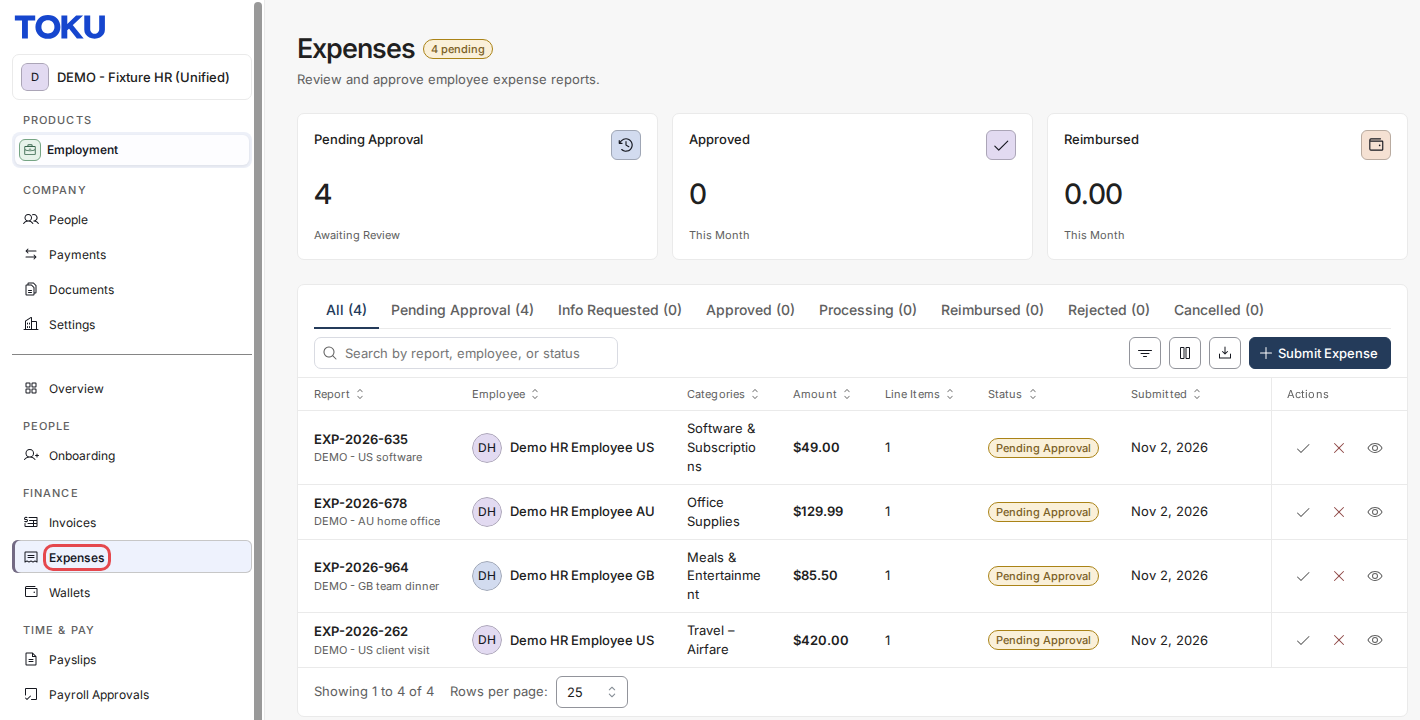
- Employee reports appear under Expenses with the status Approved, ready for your next pay run. Each line shows the amount spent and, when the currency differs, the amount in the employee's pay currency.
- Contractor reports appear under Invoices as approved reimbursement invoices.
Step 6: Expensify is updated automatically
When a report is paid in Toku, Toku marks it Reimbursed in Expensify. You don't need to do anything. If Expensify can't be reached at that moment, the payment still stands and the Toku team sends the update again. Toku first checks whether Expensify already shows the report as Reimbursed, so a report is never updated twice.
Good to know
- What Toku changes in Expensify: only one thing. After a report is paid, Toku changes its status from Approved to Reimbursed. Toku never creates or edits expenses and never changes approvals.
- Only approved reports come across. Drafts, submitted reports waiting for approval, and reports already Reimbursed or Closed in Expensify are not imported.
- Receipts stay in Expensify. Toku imports the amounts and details of each line. The receipt images remain in Expensify.
- Changes after import. If a report is reopened in Expensify and a line Toku already imported is edited, Toku keeps the original line. New lines added to a report that isn't paid yet are imported.
- Several workspaces or entities. One Expensify connection per Toku organization. If you have several workspaces or entities, we'll map them with you.
- Security. Toku uses Expensify's official API over an encrypted connection. Your secret is encrypted at rest (AES-256-GCM) and never sent back to the browser.
Questions? Email [email protected] or contact your Toku account manager.