
 8 MIN READ
 UPDATED OCT 30, 2026
💙 Audience: employees and their approvers · Customer-facing · Last verified August 19, 2026 against the platform live in production.
Who this is for and what you'll accomplish
This guide is for employees who need to request time off, and for the managers and administrators who review those requests in Toku. By the end you will know how to send a time off request, follow it to a decision, review requests as an administrator, and manage the leave types your team can choose from. You will also learn why the Time Off area can look empty for some people - and why that is usually a setting, not an error.
Before you start
- Sign in at https://app.toku.com. The screen says Welcome back and asks only for your email address: type it, select Continue, then enter your password on the next screen and select Sign in. (You can also select Sign in with Google, or Sign in with email on the password screen to get a one-time sign-in link instead of using a password.) There are no product tabs to choose any more, and the old
tga.app.toku.comaddress is no longer the way in. - To request time off, you need a standard employee account. To review requests or manage leave types, you need an administrator account.
- An administrator must have added at least one active leave type before anyone can submit a request. If no leave types are active yet, the request form cannot be completed (see "Why Time Off looks empty for some people" below).
Request time off (employee)
Step 1. Sign in and open https://app.toku.com/hris/my-time-off. You will see the My Time Off page. At the top are three summary cards - Total Leave Taken, Vacation, and Sick Leave (days taken this year) - followed by a table of your requests. If you have never requested time off, the table reads "No time off requests found." Select the dark blue Request Time Off button on the right side, just above the table.
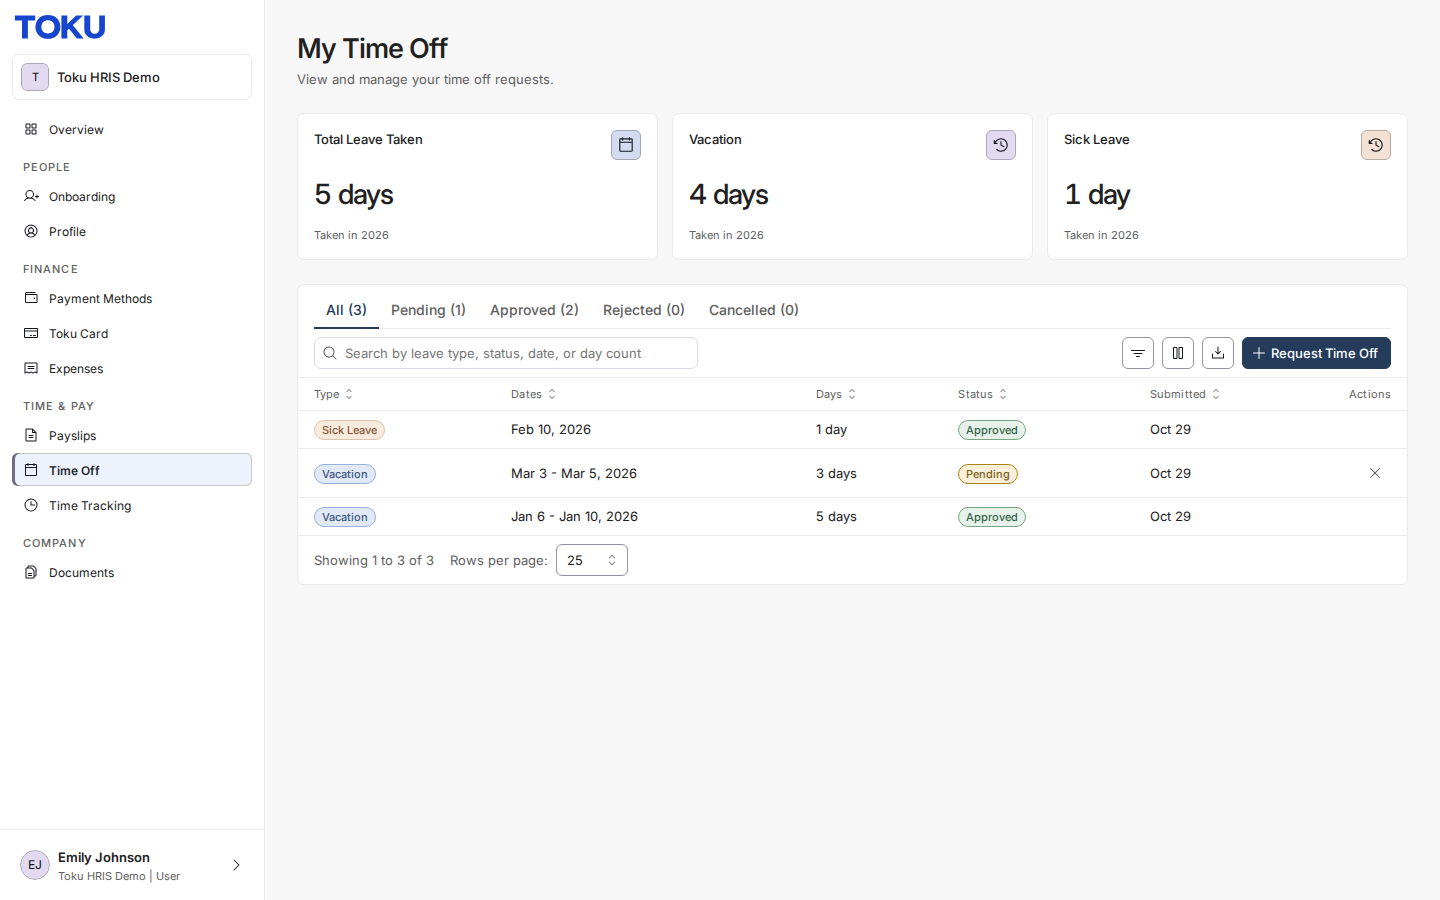
Select the dark blue "Request Time Off" button above your requests table.
Step 2. A window titled Request Time Off opens in the middle of the screen. It has three fields: Leave type, Dates, and Note (optional). Start with the Leave type menu, which reads "Select leave type" until you choose one.
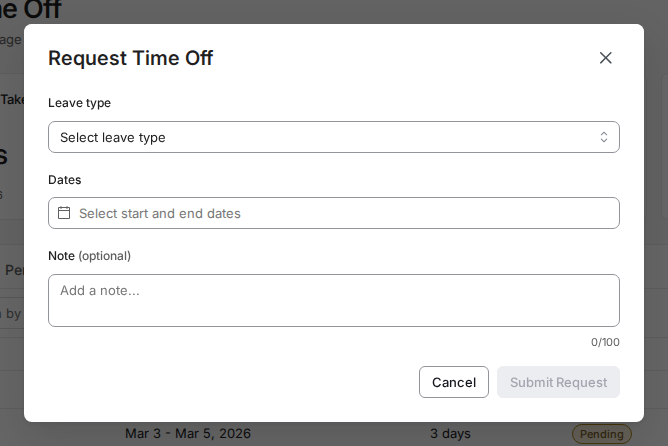
In the Request Time Off window, open the "Leave type" menu first.
Step 3. Choose the leave type that fits your absence (for example a vacation or sick-leave category - the exact list is set by your company). Then select the Select start and end dates box under Dates and pick your first and last day away in the calendar that appears. You can add a short explanation in the Note (optional) box (up to 100 characters).
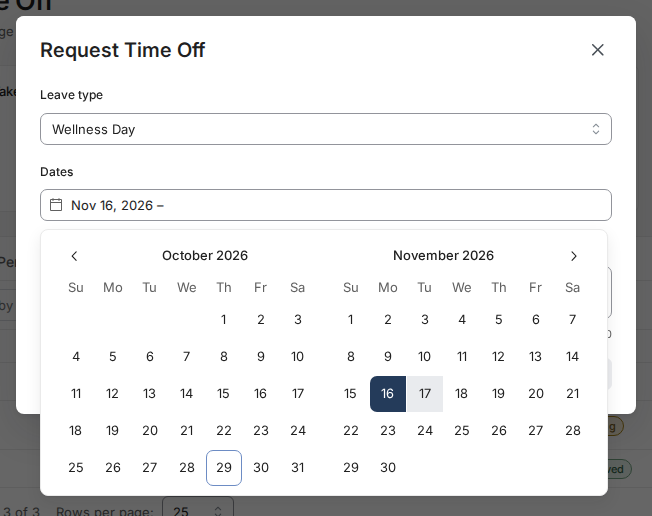
Use the "Select start and end dates" box to pick the first and last day of your time off.
Step 4. Select Submit Request in the bottom-right corner of the window. The button stays grayed out until both a leave type and dates are filled in - if you cannot press it, check that both fields are complete. If the Leave type menu has nothing to choose, your company has not activated any leave types yet; ask your administrator (see the last section). After you submit, the window closes and your request appears as a new row in the table on My Time Off.
Track your request
Step 1. Return to https://app.toku.com/hris/my-time-off at any time. Each request occupies one row showing its Type, Dates, Days, Status, and Submitted date. The Status column is where you follow the decision: a new request starts as pending, and changes once your approver acts on it. The summary cards above the table update as approved time off is used.
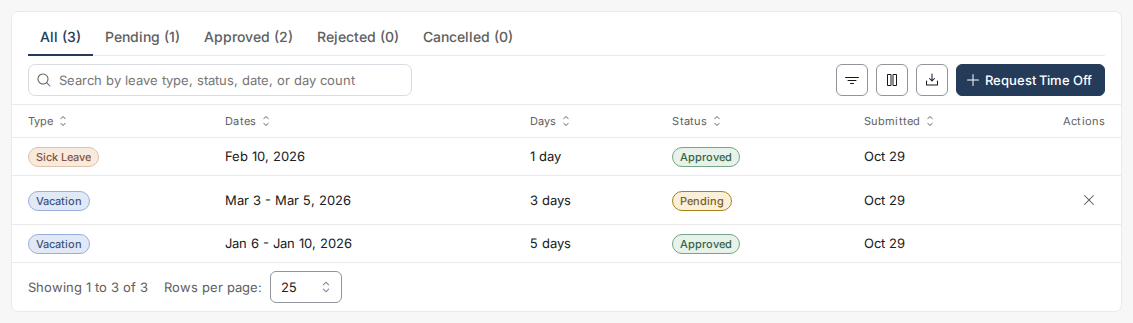
Watch the Status column on My Time Off to see the decision on each request.
Step 2. If your plans change before the request is decided, open the request's row and use the action on the right side of that row to withdraw it. If nothing seems to happen after several days, your approver may not have seen the request yet - a polite reminder to your manager or people team is the fastest fix.
Approve or deny (admin)
Step 1. Sign in with an administrator account and open https://app.toku.com/hris/time-off. This is the organization-wide Time Off page. Make sure the Requests tab (the first tab, highlighted when active) is selected. The summary cards show Pending Requests, Approved this month, who is Out today and this week, Upcoming time off, and Over balance. Every employee request appears in the table below with Name, Type, Dates, Days, and Status columns.
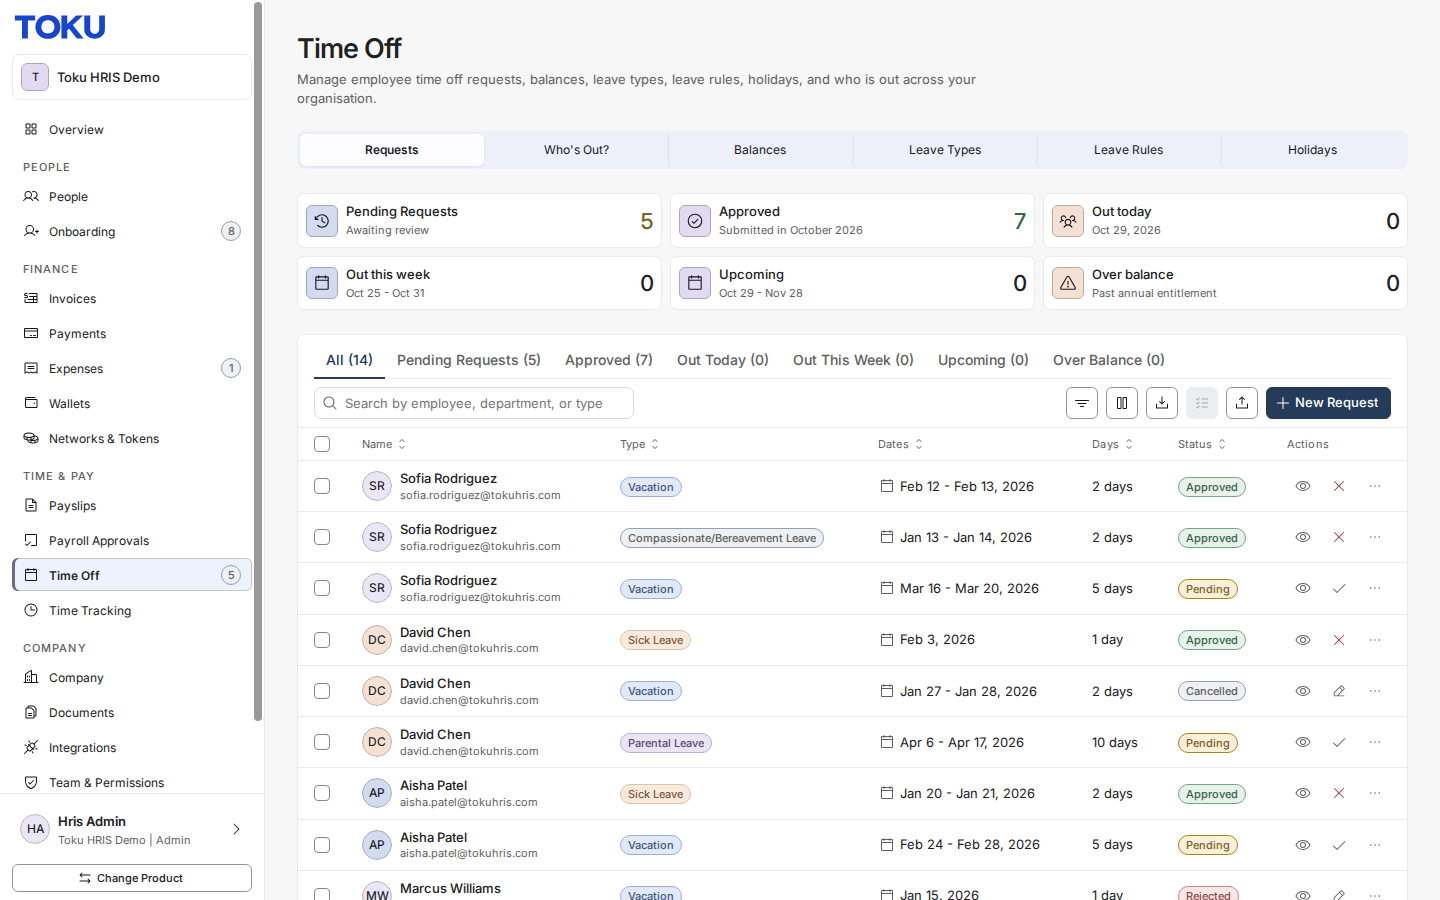
On the Time Off page, stay on the Requests tab to review your team's requests.
Step 2. Find the request you want to decide (use the search box above the table to look up an employee by name, department, or leave type). The controls to approve or decline a pending request sit in the Actions column at the far right of its row. After you act, the request's Status updates immediately and the employee sees the same status on their own My Time Off page.
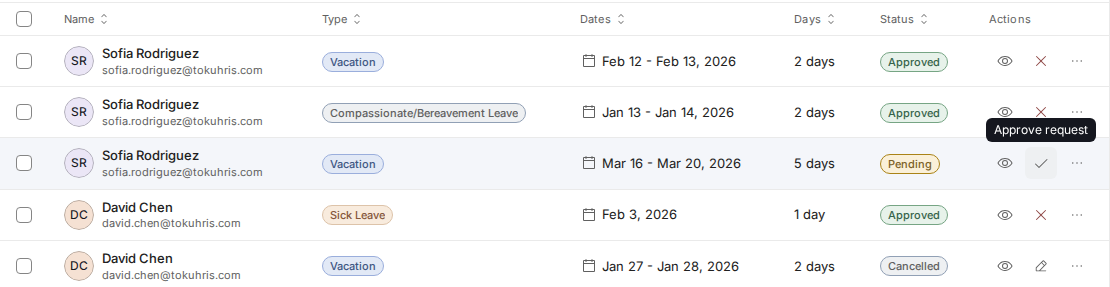
Approve or decline each pending request from the Actions column of its row.
Step 3. To decide several requests at once, tick the checkbox at the left of each row, then select the Bulk actions button above the table. You can also add time off on an employee's behalf with the dark blue New Request button, and download the full list with the Export CSV (download) button.
Leave types: global vs custom (admin)
Toku distinguishes two kinds of leave categories. Global leave types are the standard categories built into the platform (such as vacation and sick leave) and appear automatically as balances on each employee's My Time Off page. Custom leave types are extra categories your organization defines for itself - for example a study day or volunteering day.
Step 1. On https://app.toku.com/hris/time-off, select the Leave Types tab. This tab manages your organization's custom leave categories. Active leave types are available for new requests; inactive ones stay visible for historical records only. Each row shows the type's Name, Balance Type, Total/Year, and Status. To create one, select the dark blue Add Custom Leave Type button above the table.
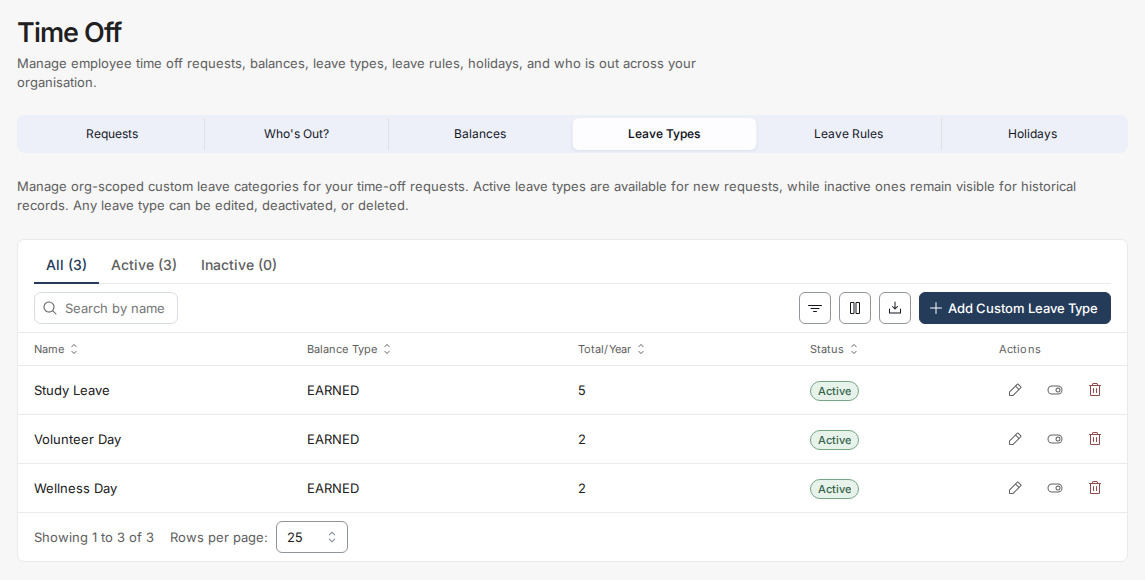
Use "Add Custom Leave Type" on the Leave Types tab to create a category of your own.
Step 2. In the window that opens, give the new type a name and complete its settings, then save. The new type appears in the table; once its Status is active, employees can choose it when they request time off. Existing types can be edited, deactivated (they stop appearing in the request form but keep their history), or deleted from the Actions column.
Step 3. To control the rules behind each leave type by country, open the Leave Rules tab. Each row shows the platform's global baseline, your organization's override, and the effective result side by side. Global rows are read-only - select the + (override) icon on a row to add your own customization, and use Add Override to create a new rule. Columns cover Country, Leave Type, Scope, Min Days, Policy, and Half Day.
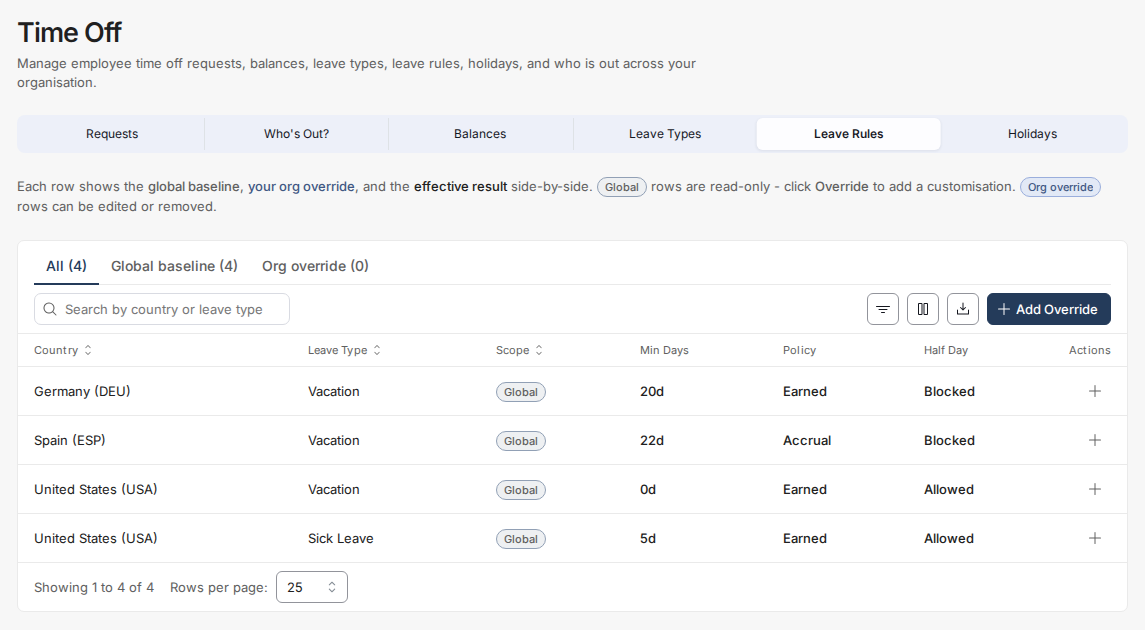
The Leave Rules tab shows global baselines and lets you add country-specific overrides.
Why Time Off looks empty for some people
- No leave types are active yet. If the Leave type menu in the request window has nothing to select, and the Leave Types tab shows zero active types, no one can submit a request. An administrator needs to activate or add leave types first. This is the most common reason the Time Off area looks "broken" for a brand-new organization.
- You work as a contractor. Time off for contractors is a setting your organization chooses, and it is switched off in many organizations. If you sign in as a contractor and see no Time Off page at all, that is a decision your company made - not an error. Ask your administrator whether contractor time off is enabled for your organization.
- Your balances show 0 days or dashes. Balance cards fill in once leave types are configured and time off has been recorded. A brand-new account can legitimately show "0 days" everywhere.
Where time off shows on your dashboard
Once your account setup is complete, your home page at https://app.toku.com includes a summary of time off alongside your other information, and administrators see organization-wide counts (such as pending requests and who is out this week) at the top of the Time Off page. If your home page still shows setup steps, finish those first - the time off summary appears after setup is complete.
Still stuck?
Contact Toku support and include: your full name, your organization's name, which page you were on (for example "My Time Off" or the "Time Off" administrator page), the leave type and dates you tried to request, and a screenshot of what you see. That lets the team reproduce the problem quickly. You can also read the earlier article "Toku: How to Submit, Approve, or Deny Time Off Requests" for the previous version of this workflow.