
 3 MIN READ
 UPDATED OCT 30, 2026
📘 For organization administrators on Toku. Last updated October 30, 2026.
Find pending time off requests from your team, approve or reject them individually, and handle multiple requests at once.
Before you start
- Sign in with an administrator account and navigate to the Time Off page.
- Make sure the Requests tab is selected (it's the first tab, highlighted when active).
- All employee requests appear in the table below the summary cards.
Find and approve a request
- Open the Requests tab. The summary cards show Pending Requests, Approved (submitted this month), who's Out today and this week, Upcoming time off, and Over balance.
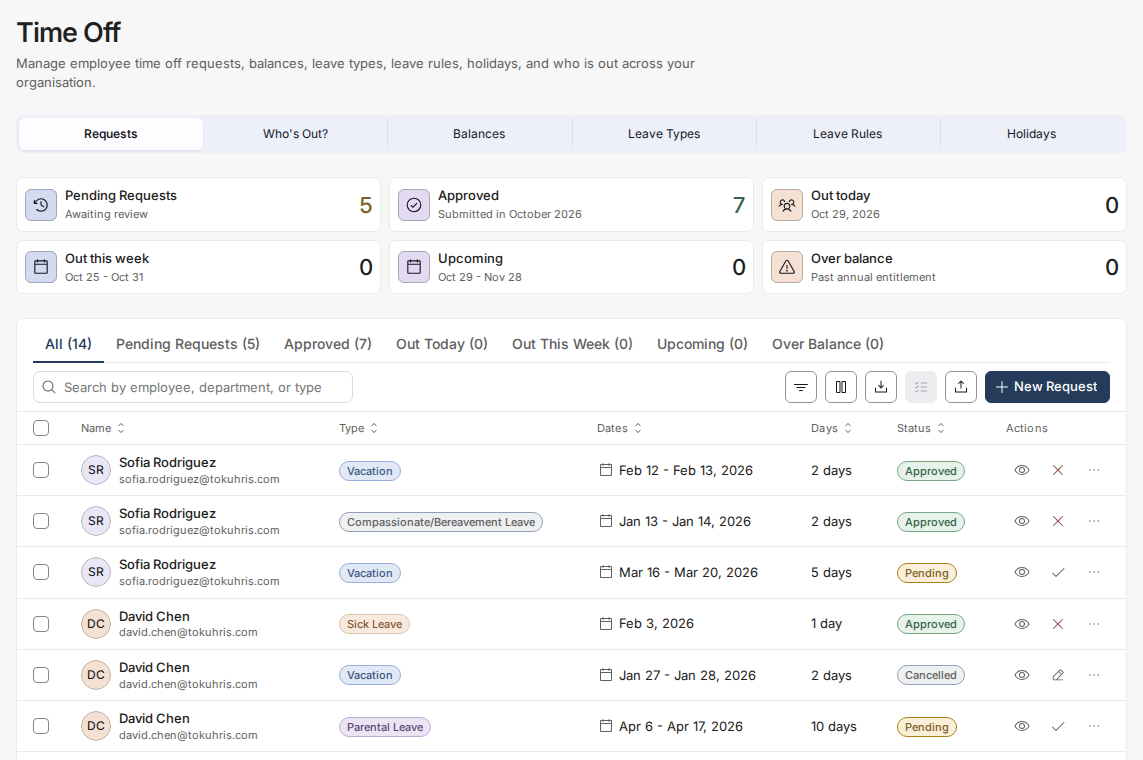
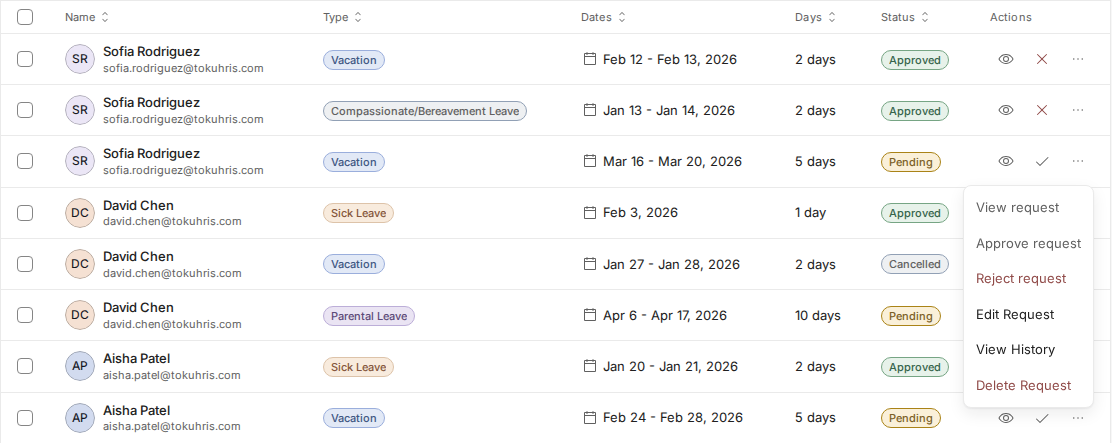
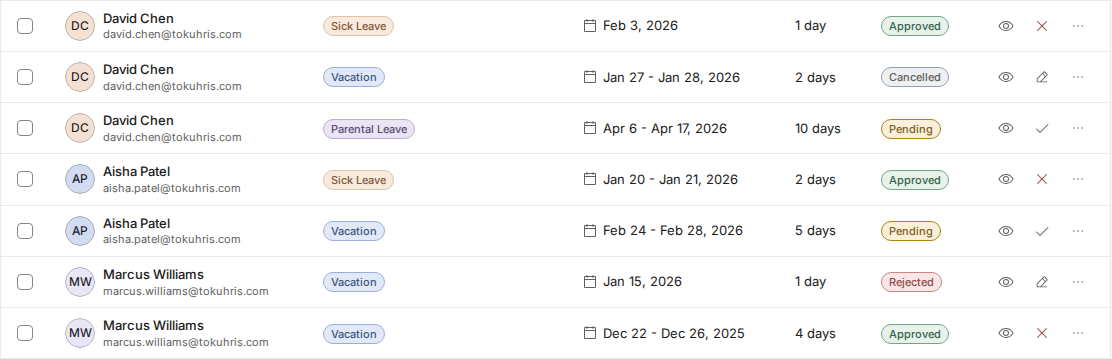
- Pending rows show the eye (view) and a check mark to Approve; to reject, open the ⋯ menu at the end of the row and select Reject request. Approved rows keep a red X so an admin can reverse an approval later if needed (you're asked for a reason). Rejected and Cancelled rows show the eye and a pencil (Edit Request).
- After you act, the request's Status updates immediately (no confirmation step) and the employee sees the same status on their own My Time Off page.
Handle multiple requests at once
- To decide several requests in one go, tick the checkbox at the left of each row, then open the Bulk actions menu (the checklist icon above the table) and choose Approve Selected or Reject Selected, then confirm.
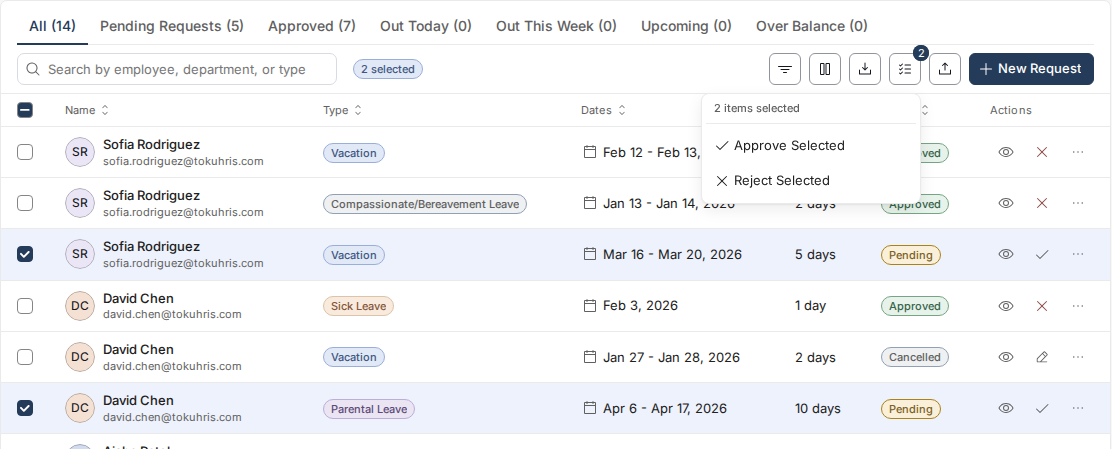
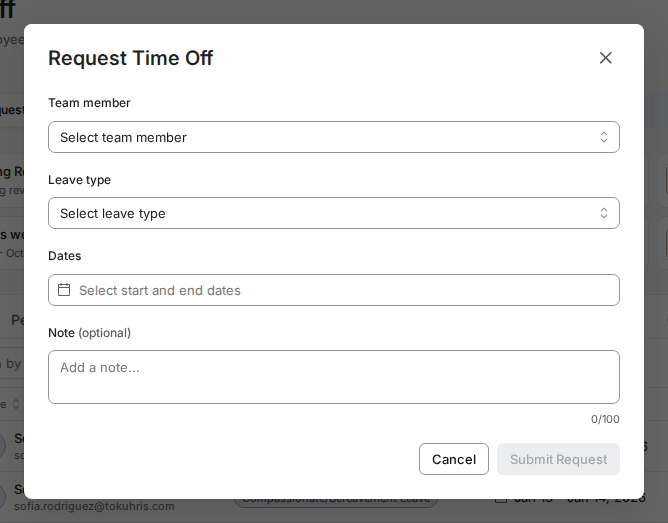
- You can also create a request on an employee's behalf with the New Request button, or download the full list with the Export CSV icon (download arrow).
Good to know
- By default, the table is sorted by submission date with the most recently submitted requests at the top. Pending requests aren't specially pinned - use the Pending Requests summary card as a count check, or filter the Status column to Pending to see them together.
- Use Filters to isolate a specific Status (for example, Pending) or Columns to customize the view for specific teams or leave types.
Still stuck?
You can email [email protected] to reach our support team. Please include your email address, organization name, and a description of what happened. Screenshots and videos are always welcome to speed up the troubleshooting process. Feel free to reach out any time for further assistance.